To replace a Whirlpool refrigerator door seal, confirm the model-specific gasket, identify whether it is press-fit or screw-retained, remove the old seal, clean the mounting area, and install the new gasket from the corners outward. Test the seal with paper and allow several hours for shipping creases to relax.
Which Gasket System Does Your Whirlpool Have?
Before reading further, identify your mounting system in 30 seconds:
Step 1: Open the refrigerator door and find the inner edge of the gasket at the top corner.
Step 2: Gently lift the inner rubber lip with your finger.
- If you see a plastic dart or rib pressed into a groove → You have a press-fit gasket. Jump to the “Install a Press-Fit Whirlpool Gasket” section below.
- If you see small hex screws (1/4-inch head) or a plastic retaining strip → You have a screw-retained gasket. Jump to the “Install a Screw-Retained Whirlpool Gasket” section below.
- Not sure? Check your model manual or search your full model number on AppliancePartsPros.com — the part listing usually specifies the mounting type.
A loose, cracked, or twisted refrigerator gasket can cause more than a draft. Warm kitchen air enters the cabinet, moisture gathers near shelves, frost develops in the freezer, and the compressor may run longer. Food near the door can also warm faster because this is one of the refrigerator’s least stable temperature zones.
Learning how to replace a door seal on a Whirlpool refrigerator is manageable with basic tools. The key is identifying the exact door design before pulling anything apart. Many newer Whirlpool models use a press-fit gasket with a barbed “dart” that pushes into a channel. Older platforms may trap the gasket flange beneath the inner liner with hex-head screws or a retaining strip.
Whirlpool does not publish a universal model-year cutoff for gasket mounting systems. Screw-retained designs are common on legacy models, while press-fit channels appear on many newer models through 2026. Both systems overlap across product lines, so you cannot identify the mounting method by year alone. Verify this with your model manual and inspect the gasket edge before ordering parts.
This guide explains how to identify the correct part, remove both major gasket styles, install the replacement without stretching it, correct Whirlpool-specific sealing problems, and confirm that the refrigerator holds 37°F (3°C).
Why a Damaged Whirlpool Refrigerator Door Seal Matters
A failing gasket does not always look badly torn. A small split near a lower corner can admit humid air whenever the compressor runs. You may notice condensation on containers, frost near an air vent, or a refrigerator that rarely shuts off.
The problem can also resemble a cooling-system failure. Before suspecting the compressor, fan, or control board, inspect the gasket perimeter. Close a strip of printer paper in the door and pull gently. A good section should create clear resistance. If the paper slides out easily, check for dirt, a folded lip, a loose mounting dart, or poor door alignment.
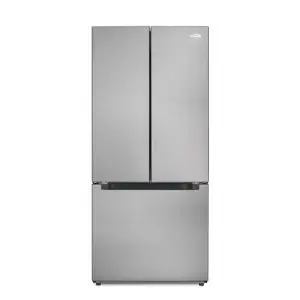
Whirlpool model labels are inside the fresh-food compartment. Common locations include the upper-left wall, upper front area, and liner near the upper-right side of the crisper pan. Side-by-side models may place the label on the right interior wall, while some four-door models use the left interior wall. Copy the complete model number, including the final digits, because similar refrigerators can use different left, right, freezer, or color-specific seals.
French-door owners should also inspect the vertical hinged mullion on the left door. This center seal must fold inward when the door opens and align between both doors when they close. A stuck or outward-folded mullion can imitate a bad perimeter gasket.
Did You Know: A refrigerator door seal does not create cooling. It keeps conditioned air inside and limits the warm, moist air that causes condensation, frost, and longer compressor run times.
Note for UK and Australian readers: Whirlpool refrigerators are less commonly sold under the Whirlpool brand name in the UK and Australia. If you own a Hotpoint or Indesit refrigerator in the UK, these are Whirlpool-owned brands and use compatible parts from the same OEM system.
In Australia, Whirlpool refrigerators were sold directly under the Whirlpool name — search your model number on appliancespareparts.com.au or contact Whirlpool Australia at 1300 945 784 for parts support.
Best Ways to Replace a Whirlpool Refrigerator Door Seal
Confirm the Exact Whirlpool Gasket
Best for: Every repair, especially French-door models with different left and right seals.
How to do it:
- Find the full model number inside the refrigerator compartment and photograph the label.
- Match the gasket by door position, color, and complete model suffix.
- Confirm the OEM number. Common Whirlpool formats include W######## and WPW########; legacy parts may use shorter numbers or superseded numbers.
Expected result: You receive a gasket that matches the channel, dimensions, color, and mounting profile.
Where to buy and what to expect to pay:
- AppliancePartsPros.com — Largest US Whirlpool OEM inventory, same-day shipping on many parts
- RepairClinic.com — Strong for legacy and older Whirlpool models
- Amazon — Third-party compatible options, verify fitment carefully
- eSpares.co.uk — Best option for UK Whirlpool owners
- Appliance Spare Parts (AU) — For Australian Whirlpool model owners
Expected cost: OEM Whirlpool replacement gaskets typically cost $35–$90 USD (£30–£70 UK / $55–$130 AUD). Third-party compatible gaskets cost less but may not match the OEM dart profile precisely. For press-fit systems, OEM fit is strongly recommended to avoid channel gaps.
Identify the Mounting System
Best for: Owners unsure whether the seal pulls out or is held by screws.
How to do it:
- Lift the inner lip at a top corner without tearing it.
- Look for a barbed rib pressed into a groove, which indicates a press-fit design.
- If you see 1/4-inch hex screws or a plastic retainer, verify this with your model manual before loosening anything.
Expected result: You avoid damaging the liner or pulling on a screw-retained gasket.
Relax Shipping Creases
Best for: Folded replacement gaskets that arrive twisted or wavy.
How to do it:
- Lay the gasket flat in a warm room for several hours.
- Place it in warm, not boiling, water for 10 to 15 minutes if deep folds remain.
- Use a hair dryer on low from at least 6 inches away, moving constantly.
Expected result: The gasket becomes flexible enough to sit flat without waves.
Clean the Channel and Contact Surface
Best for: Refrigerators with sticky residue, crumbs, or grime around the seal.
How to do it:
- Mix warm water with mild dish detergent.
- Clean the groove, liner edge, and cabinet contact surface with a microfiber cloth and soft toothbrush.
- Dry every section before installing the new seal.
Expected result: The gasket seats evenly against a clean, smooth surface.
Install a Press-Fit Whirlpool Gasket
Best for: Whirlpool models using a channel-mounted seal.
How to do it:
- Align the molded corners and press the dart into both top corners.
- Seat the bottom corners next without stretching the gasket.
- Press the top, sides, and bottom into the channel in short sections.
Expected result: The gasket remains square, fully seated, and free from stretched corners.
Install a Screw-Retained Whirlpool Gasket
Best for: Older or legacy models with screws beneath the inner gasket lip.
How to do it:
- Use a Klein Tools 1/4-inch nut driver to loosen each screw two or three turns.
- Pull the old flange from under the retainer and slide the new flange evenly into place.
- Square the door, then tighten opposite sides gradually without crushing the liner.
Expected result: The gasket is clamped evenly while the door stays straight.
Step-by-Step Guide
- Disconnect power. Unplug the refrigerator or switch off its circuit breaker. Move door items into a cooler.
- Record the model number. Check the upper-left wall, upper front liner, or area near the crisper. Confirm the exact door position.
- Compare the parts. Match corner shape, mounting rib, magnet orientation, color, and dimensions.
- Remove the old gasket. Pull a press-fit seal straight out from a corner. For a retained seal, loosen the hidden screws and release the flange.
- Clean the mounting area. Use warm water and mild detergent. Remove debris with a soft toothbrush, then dry the channel.
- Install without stretching. Seat all four corners first. Press the remaining gasket into place in 4- to 6-inch sections.
- Correct small waves. Warm only the affected area with a low hair-dryer setting while shaping it by hand.
- Test and stabilize. Reconnect power, set the refrigerator to 37°F (3°C) and freezer to 0°F (-18°C), then perform the paper test around the door. Keep the door closed for several hours before judging minor creases.
Use a Taylor 5925N refrigerator/freezer thermometer or a comparable appliance thermometer to verify the temperature after 24 hours. On app-connected Whirlpool models, alerts can identify a door left open, but a physical thermometer confirms the temperature where food is stored.

Expert Tips and Common Mistakes
- Mark weak areas before removal. Put painter’s tape on the cabinet wherever the paper test fails, then retest those points.
- Photograph the corner orientation. Whirlpool left-door and right-door seals can look similar until you compare their molded corners.
- Start with corners. Seating all four corners first prevents a press-fit gasket from becoming too long on the final side.
- Check refrigerator level. A twisted cabinet or sagging door can create a gap that a new gasket cannot correct.
- Inspect the French-door mullion separately. If the left-door center seal does not fold and align, the perimeter gasket may not be the cause.
Common Mistakes to Avoid
- Ordering by size alone: Similar-looking Whirlpool seals may use different mounting darts or door positions. Use the complete model number.
- Removing every retainer screw: This can release or distort the inner liner. Loosen screws only enough to slide the gasket flange.
- Stretching the gasket: Pulling it along one side creates rounded corners and gaps. Press it into position instead.
- Using excessive heat or petroleum products: High heat can deform the seal, while oils and harsh cleaners may damage its material.
A new seal may feel unusually strong. Closing the door pushes air from the cabinet, and the magnetic strip grips the frame. This is normal when the door opens smoothly after a short pause and the gasket is not folded.
FAQs
How do I know which Whirlpool refrigerator door seal to buy?
Use the full model number from the label inside the fresh-food compartment. Check the upper-left wall, upper front liner, right interior wall on many side-by-side models, or left wall on some four-door units. Match the exact door position and OEM number. Parts such as W10830189, W10830055, WPW10460580, and W11378944 are examples, not universal replacements.
Are all Whirlpool refrigerator door seals press-fit?
No. Many current Whirlpool refrigerators use a press-fit or dart-style gasket that pushes into a door-liner channel. Older and legacy models may hold the gasket beneath a retaining strip with 1/4-inch hex screws. Designs overlap across model years, so inspect beneath the inner gasket lip and verify this with your model manual before removal.
Can I replace a Whirlpool refrigerator gasket without removing the door?
Usually, yes. Most press-fit gaskets can be replaced while the door remains attached. Screw-retained designs can often be serviced in place by loosening the hidden screws. Remove the door only when model-specific instructions require it or access is blocked. Support any removed door carefully because bins, wiring, and dispensers add weight.
How long should a new Whirlpool door seal take to settle?
Minor shipping creases often relax within several hours, but allow up to 24 hours before making a final judgment. Keep the door closed as much as possible. If a gap remains, confirm that the mounting dart is seated, warm the area gently, check cabinet level, and repeat the paper test.
What temperature should I check after replacing the seal?
Set the refrigerator to 37°F (3°C) and the freezer to 0°F (-18°C). Place an appliance thermometer near the center of each compartment, away from walls and air vents. Check again after 24 hours. Persistent warm temperatures can indicate a door-alignment, airflow, fan, sensor, or sealed-system problem beyond the gasket.
Why is my Whirlpool French-door refrigerator still leaking air?
Inspect the left-door hinged mullion as well as the perimeter gaskets. The mullion should fold inward when the left door opens and form the center seal when both doors close. If it is stuck outward, misaligned, or damaged, the doors may leak even with new gaskets. Verify the mullion position before ordering another seal.
How much does it cost to replace a Whirlpool refrigerator door seal?
An OEM Whirlpool replacement gasket typically costs between $35 and $90 USD depending on your specific model and door position. French-door models with separate left and right seals may require purchasing two gaskets. If you replace the seal yourself, that is the only cost.
A professional appliance technician in the US typically charges $120 to $200 including labor for this repair, making DIY replacement a cost-effective option for most homeowners.
Conclusion
Replacing a worn gasket can restore stable cooling, reduce condensation, protect stored food, and prevent unnecessary compressor run time. The most important step is confirming the complete Whirlpool model number and identifying the mounting system before removing the old seal.
When learning how to replace a door seal on a Whirlpool refrigerator, work slowly. Match the OEM part, relax shipping folds, clean the channel, seat the corners before the sides, and avoid stretching the gasket. Then verify the repair with paper around the full perimeter and a thermometer inside the cabinet.
Whirlpool designs vary by production platform. Press-fit and screw-retained systems can overlap across years, so verify this with your model manual whenever the mounting method is unclear.
Today, photograph your model label and perform the paper test at every corner before ordering a replacement.
For more refrigerator tips and appliance guides, explore more at refrigeratorSolve.

Hi, I’m the lead researcher and appliance enthusiast behind RefrigeratorSolve. With years of hands-on experience troubleshooting cooling systems and testing home appliances, I am dedicated to bringing you honest reviews, energy-saving tips, and practical solutions to keep your refrigerator running perfectly.