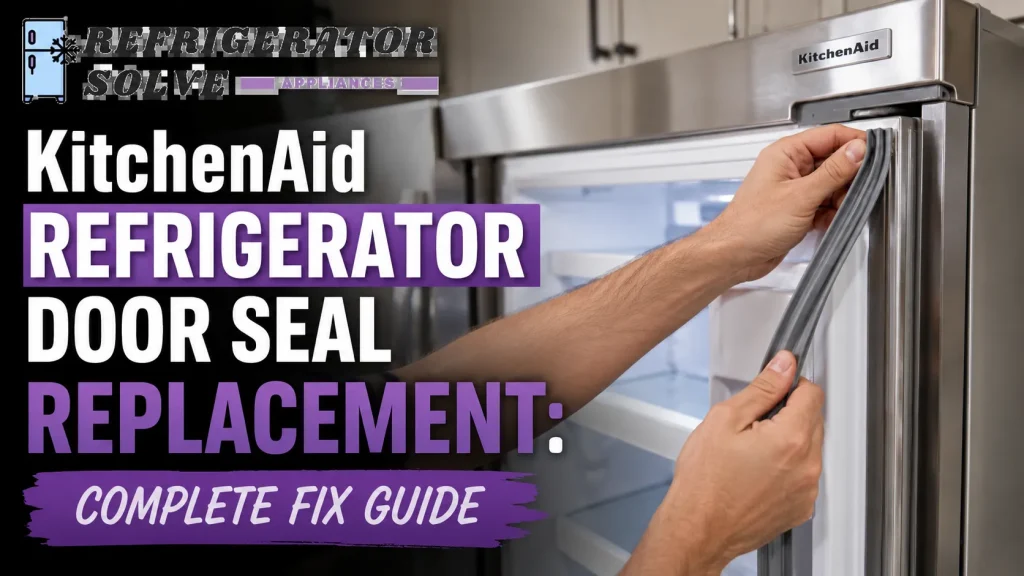
KitchenAid refrigerator door seal replacement is needed when the gasket becomes cracked, loose, dirty, or stops creating an airtight seal. Replacing the door gasket correctly can help restore cooling performance, reduce frost buildup, and improve refrigerator efficiency.
A refrigerator door that does not close tightly can create frustrating problems. You may notice warm food, extra condensation, frost around the freezer area, or a compressor that seems to run constantly. In many cases, the cause is a damaged or worn KitchenAid refrigerator door seal.
The door gasket is a flexible barrier between the refrigerator cabinet and the door. Its job is to trap cold air inside and prevent warm kitchen air from entering. Over time, repeated opening, cleaning chemicals, temperature changes, and normal wear can affect the seal.
Replacing the gasket is one of the most practical refrigerator maintenance tasks many homeowners can complete. The process requires careful measurement, correct gasket selection, and proper installation so the magnetic seal sits evenly around the entire door.
In this guide, you will learn how to identify a bad KitchenAid refrigerator gasket, replace it step by step, avoid common installation mistakes, and keep your refrigerator working efficiently.
Why KitchenAid Refrigerator Door Seal Problems Matter
A damaged refrigerator door gasket can create more than a simple closing problem. When the seal leaks, your refrigerator has to work harder to maintain the correct internal temperature.
Many KitchenAid refrigerators are designed with strong cooling systems, but even advanced appliances depend on a properly sealed door. A weak gasket can affect temperature stability and food storage quality.
Common signs that your KitchenAid refrigerator door seal needs attention include:
- Visible cracks or tears in the rubber gasket
- The refrigerator door feels loose when closed
- Paper test fails because the paper slides out easily
- Frost appears near the freezer door area
- Moisture collects around the door frame
- Food compartments struggle to maintain proper cooling
A refrigerator should generally maintain a temperature near 37°F (3°C) for fresh food storage, while freezer sections are commonly kept around 0°F (-18°C). A leaking door seal can make maintaining these temperatures more difficult.
Did You Know: Refrigerator door gaskets use magnetic strips inside the flexible material to create a tight seal against the cabinet. A clean, properly aligned gasket helps reduce cold air loss.
KitchenAid refrigerators can have different gasket designs depending on the model and production year. Some use press-fit gasket systems, while others may include retaining channels or additional fastening methods. Always verify the exact installation style using your refrigerator model information before ordering a replacement.
Best Solutions for KitchenAid Refrigerator Door Seal Replacement
Clean and Inspect the Existing Door Gasket
Best for: Homeowners who suspect dirt or food residue is preventing a proper seal.
How to do it:
- Open the refrigerator door and inspect the entire gasket surface, especially corners and folds where debris collects.
- Mix mild dish soap with warm water and clean the gasket using a soft cloth.
- Dry the gasket completely and check for cracks, gaps, or areas that no longer touch the refrigerator cabinet.
Expected result: A cleaner gasket may restore sealing performance if the rubber is still flexible and undamaged.
Confirm the Correct KitchenAid Replacement Gasket
Best for: Anyone replacing a damaged gasket and wanting the correct fit.
How to do it:
- Locate your KitchenAid refrigerator model number before ordering a replacement part.
- Check the model tag location, which is commonly found inside the refrigerator compartment on the side wall, ceiling area, or near the crisper drawer section depending on the model.
- Match the replacement gasket using the full model number because KitchenAid gasket designs vary between refrigerator series.
Expected result: The correct gasket prevents installation problems and ensures proper door sealing.
KitchenAid is a Whirlpool Corporation brand, which means many KitchenAid refrigerator gaskets share compatible part numbers with certain Whirlpool and Maytag models from the same production year.
Common KitchenAid door gasket part numbers include formats such as W10830162, WPW10830162, and W11396634, but the correct number depends entirely on your specific model.
Always search using your full model number on an appliance parts retailer such as Repair Clinic or PartSelect to confirm compatibility before purchasing.
Replace a Press-Fit KitchenAid Door Gasket
Best for: Many KitchenAid refrigerators where the gasket pushes into a molded door channel.
How to do it:
- Remove the old gasket by pulling the inner edge away from the door channel carefully.
- Warm the new gasket with warm water or allow it to reach room temperature so it becomes flexible.
- Press the replacement gasket firmly into the channel starting from one corner and working around the door.
Expected result: The new gasket sits evenly and creates a complete magnetic seal.
Fix Gasket Alignment After Installation
Best for: New gaskets that look correct but still leak air.
How to do it:
- Close the refrigerator door and check whether the gasket touches the cabinet evenly.
- Use a hair dryer on a low heat setting to gently soften warped gasket sections.
- Reshape the gasket by hand and allow it to cool while positioned correctly.
Expected result: The gasket forms a smoother seal around the refrigerator door.
Replace the Door Seal Screws or Retaining Components If Needed
Best for: KitchenAid models using additional gasket retaining systems.
How to do it:
- Inspect behind the gasket edge to see whether screws, liners, or retaining strips are visible.
- Remove only the necessary fasteners while keeping track of their position.
- Install the new gasket using the original retaining method and tighten components evenly.
Expected result: The gasket stays secure instead of pulling away from the door.
Check Door Hinges and Door Sag
Best for: Refrigerators where a new gasket still does not seal properly.
How to do it:
- Look at the refrigerator door from the front and check whether it hangs unevenly.
- Inspect hinge areas for loose screws or movement.
- Adjust or tighten hardware if your model allows adjustment.
Expected result: A properly aligned door allows the gasket to make full contact.
Identify Whether Your KitchenAid Uses a French Door or Side-by-Side Gasket System
Best for: Homeowners unsure which gasket type their KitchenAid model requires before ordering a replacement.
How to do it:
- Check your refrigerator style — KitchenAid French door models such as the KRMF706E series use separate gaskets for the upper fresh food doors and a different seal for the lower freezer drawer
- KitchenAid side-by-side models such as the KRSC503E series use full-length door gaskets on both the refrigerator and freezer doors independently
- Built-in KitchenAid models use custom-fit gaskets that are not interchangeable with freestanding model seals — check your model series before ordering
- Counter-depth KitchenAid models have shallower door dimensions which require specifically sized gaskets — confirm depth measurements before purchase
Expected result: Ordering the correct gasket type for your specific KitchenAid configuration prevents installation failure and return shipping delays.
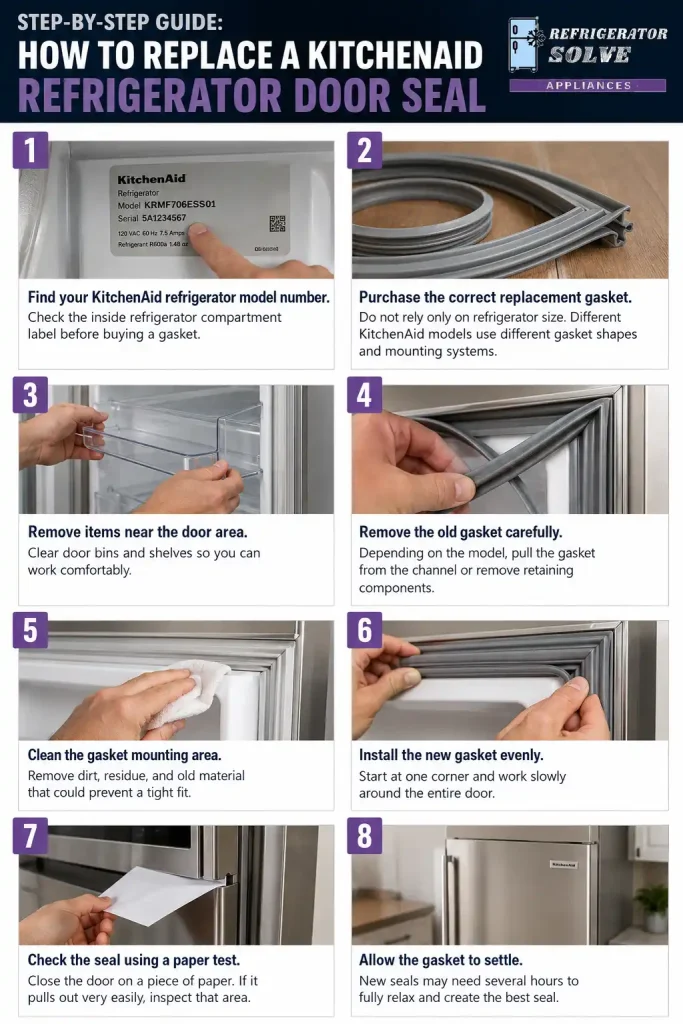
Step-by-Step Guide: How to Replace a KitchenAid Refrigerator Door Seal
- Find your KitchenAid refrigerator model number.
Check the inside refrigerator compartment label before buying a gasket. - Purchase the correct replacement gasket.
Do not rely only on refrigerator size. Different KitchenAid models use different gasket shapes and mounting systems. - Remove items near the door area.
Clear door bins and shelves so you can work comfortably. - Remove the old gasket carefully.
Depending on the model, pull the gasket from the channel or remove retaining components. - Clean the gasket mounting area.
Remove dirt, residue, and old material that could prevent a tight fit. - Install the new gasket evenly.
Start at one corner and work slowly around the entire door. - Check the seal using a paper test.
Close the door on a piece of paper. If it pulls out very easily, inspect that area. - Allow the gasket to settle.
New seals may need several hours to fully relax and create the best seal.
Expert Tips and Common Mistakes
- Check the entire gasket, not only damaged areas. Small leaks around corners can affect cooling.
- Use warm water to soften a replacement gasket before installation. Cold rubber is harder to shape.
- Keep refrigerator temperature near 37°F (3°C). Correct settings help protect stored food.
- Inspect door alignment before replacing expensive parts. A sagging door can damage even a new gasket.
- Clean the gasket monthly. Regular maintenance prevents buildup that weakens sealing.
Check whether your KitchenAid model has a mullion gasket. Some KitchenAid French door refrigerators include a center mullion seal between the two upper doors in addition to the main door gaskets. This mullion gasket fails separately and must be replaced independently — missing this during inspection is a common reason cooling problems continue after a main gasket replacement.
Common Mistakes to Avoid
- Installing the wrong gasket model. KitchenAid refrigerators have many designs, and an incorrect gasket may not sit properly.
- Stretching the gasket during installation. This can create uneven corners and air leaks.
- Using harsh cleaners on the rubber seal. Strong chemicals may reduce gasket flexibility over time.
- Ignoring door alignment problems. A replacement gasket cannot fully fix a door that does not close correctly.
FAQs
How do I know if my KitchenAid refrigerator door seal needs replacement?
Your KitchenAid refrigerator door seal needs replacement when the gasket shows visible cracks, tears, or gaps, or when it no longer holds a paper strip firmly when tested. Frost buildup near the door edges, moisture collecting around the door frame, and longer compressor running cycles are also reliable warning signs that the current seal has failed.
Where is the KitchenAid refrigerator model number located?
The KitchenAid refrigerator model number is commonly located inside the refrigerator compartment on a side wall, upper interior area, or near the crisper drawers. Always verify the model number before ordering a gasket because similar refrigerator designs may use different seals.
Does KitchenAid use a screw-in or press-fit refrigerator gasket?
KitchenAid refrigerator gasket systems vary by model. Many models use a press-fit gasket that installs into a door channel, while some designs may include retaining strips or additional fastening methods. Verify your exact model before removing the old seal.
How long does a new KitchenAid refrigerator door gasket last?
A properly installed gasket can last for years with regular cleaning and careful use. The lifespan depends on usage, kitchen conditions, door operation, and maintenance habits.
Why is my new KitchenAid refrigerator gasket still leaking?
A new gasket may leak if it is not seated correctly, the door is misaligned, the gasket is warped, or the refrigerator cabinet is not making even contact. Check corners, hinges, and the full gasket surface.
Can I repair a damaged KitchenAid refrigerator gasket instead of replacing it?
Small surface issues may sometimes improve with cleaning or reshaping, but cracked or torn gasket material usually requires replacement. A damaged seal cannot reliably maintain an airtight refrigerator compartment.
Conclusion
A properly working refrigerator door seal plays a major role in keeping food fresh, maintaining stable temperatures, and improving appliance efficiency. When the gasket becomes worn or damaged, replacing it can restore your refrigerator’s performance without replacing the entire appliance.
The right KitchenAid refrigerator door seal replacement process starts with identifying the correct model, choosing the compatible gasket, installing it carefully, and checking the final seal around the complete door.
Small maintenance habits like cleaning the gasket, checking alignment, and monitoring temperature settings can extend the life of your refrigerator and prevent future cooling problems.
Inspect your KitchenAid refrigerator gasket today and check for cracks, gaps, or weak sealing areas.
For more refrigerator tips and appliance guides, explore more at refrigeratorSolve.

Hi, I’m the lead researcher and appliance enthusiast behind RefrigeratorSolve. With years of hands-on experience troubleshooting cooling systems and testing home appliances, I am dedicated to bringing you honest reviews, energy-saving tips, and practical solutions to keep your refrigerator running perfectly.