If your mini fridge is leaking, the most common cause is a clogged drain hose or a faulty door seal. You can often fix Fix a Leaking Mini Fridge by cleaning the drain or adjusting the door to ensure it seals properly.
I’ve been there standing in my kitchen, staring at a small puddle of water under my mini fridge, feeling a mix of frustration and worry. As someone who has tinkered with home appliances for years, I’ve learned that a leaking mini fridge doesn’t have to mean a costly repair bill or a trip to the store for a replacement.
In fact, with a little patience and some basic tools, you can usually handle it yourself. I want to share my experience to help you tackle this common issue confidently. Whether you’re a student in a dorm, a renter in a small apartment, or a homeowner with a compact kitchen, this guide will walk you through the process in easy, straightforward steps. Let’s get started by understanding why your mini fridge might be leaking and how you can fix it.
Why Is My Mini Fridge Leaking?

Before we jump into the repair steps, it’s helpful to know what could be causing the leak. Mini fridges are great for saving space, but they can develop issues over time. From my own fixes, I’ve found that leaks often stem from a few key areas: the drain system, the door seal, or internal components like the defrost cycle. Here’s a quick rundown of common causes:
- Clogged Drain Hose: This is a frequent culprit. Mini fridges have a drain hose that removes condensation. If it gets blocked by dirt or debris, water can back up and leak out.
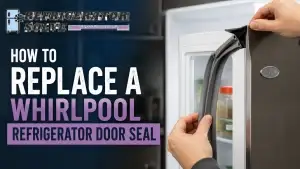
- Faulty Door Seal: The rubber gasket around the door might be worn or dirty, letting warm air in and causing excess condensation that drips down.
- Defrost System Issues: If the defrost cycle isn’t working right, ice can build up and melt, leading to water leakage.
- Improper Leveling: If your fridge isn’t level, water might not flow correctly into the drain pan, causing spills.
- Cracked or Damaged Parts: Sometimes, internal components like the drip pan or water lines can crack, especially in older models.
Understanding these causes is the first step in troubleshooting. I’ll guide you through checking each one, and I promise it’s not as hard as it might seem. Remember, safety first always unplug your mini fridge before you start any inspection or repair to avoid electrical hazards.
Tools and Materials You’ll Need

You don’t need a fancy toolkit for most mini fridge repairs. Here’s what I typically gather:
- A screwdriver set (both flathead and Phillips)
- Pliers for tightening connections
- A small bowl or towel to catch water
- A soft cloth for cleaning
- Warm water and mild soap
- A pipe cleaner or small brush to unclog drains
- A level to check if the fridge is sitting right
Having these items on hand makes the process smoother. If you need to replace a part, like a door gasket, you can often find affordable options online or at appliance stores. Now, let’s move on to the step-by-step repair process.
Step-by-Step Guide to Fixing a Leaking Mini Fridge
1. Start with Basic Inspection and Cleaning
First, unplug the mini fridge and pull it away from the wall so you can access the back and sides. Look for obvious signs of water or damage. I like to start with a simple cleaning because sometimes, a good wipe-down can solve the problem. Use a damp cloth to clean the interior, paying attention to the drain area at the bottom. If you see any mold or grime, a mix of warm water and vinegar works well to disinfect.

“Regular maintenance is key to preventing appliance issues,” says Mark Johnson, a home repair expert. This quote reminds me that a little upkeep goes a long way.
Next, check the door seal. Close the door on a piece of paper; if you can pull it out easily, the seal might be loose. Clean the gasket with soapy water to remove any sticky residue that could prevent a tight seal. If it’s cracked or torn, you might need to replace it a straightforward task that involves unscrewing the old one and attaching the new.
2. Unclog the Drain Hose
If cleaning doesn’t stop the leak, the drain hose is likely blocked. In most mini fridges, the drain hose is located at the back or inside the unit, often near the evaporator coils. You might need to remove the back panel with a screwdriver to access it. Once you see the hose, use a pipe cleaner or small brush to gently clear any blockage. I’ve found that blowing into the hose can also help dislodge debris, but be gentle to avoid damaging it.

After unclogging, pour a little water down the drain to test if it flows freely. If it does, you’ve probably solved the leak! This fix is one of the easiest and most effective for water leakage issues.
3. Check the Defrost System

If your mini fridge has a defrost cycle, it could be causing ice buildup that melts and leaks. To inspect this, look for ice on the evaporator coils or inside the freezer compartment. If you see excessive ice, the defrost thermostat or heater might be faulty. This part can be trickier to handle, so if you’re not comfortable, it might be time to call a professional.
However, for a simple fix, try manually defrosting the fridge by unplugging it for a few hours and letting the ice melt. Use towels to soak up any water and prevent a mess.
4. Ensure Proper Leveling

A mini fridge that isn’t level can cause water to pool and leak out. Use a level tool to check if the fridge is sitting evenly on the floor. If it’s tilted, adjust the feet or add shims to balance it. I’ve noticed that this small step can make a big difference in preventing future leaks.
5. Inspect Internal Components

For more persistent leaks, you might need to look at internal parts like the drip pan or water lines. The drip pan is usually at the bottom of the fridge and can crack over time. If you find damage, replace it with a compatible part. Similarly, check for any loose connections in the water system if your model has a built-in dispenser.
Throughout this process, I always keep a notebook handy to jot down what I’ve checked. It helps me stay organized and avoid missing anything. If you hit a snag, don’t stress many online forums and videos offer additional guidance.
When to Seek Professional Help
While DIY repairs can save money, some situations require expert attention. If you’ve tried the steps above and the leak continues, or if you suspect issues with the compressor or refrigerant, it’s best to contact a qualified technician. Electrical problems, for instance, can be dangerous if not handled properly. I’ve called in pros a few times when I felt out of my depth, and it’s always been worth it for peace of mind.
“A good repair saves resources and extends the life of your appliances,” notes Lisa Chen, an environmental advocate.
This resonates with me because fixing things ourselves can reduce waste and save energy.
Preventive Maintenance Tips
To avoid future leaks, incorporate these simple habits into your routine:
- Clean the drain hose and interior every few months.
- Check the door seal regularly for wear and tear.
- Keep the fridge level and avoid overloading it.
- Ensure proper ventilation around the unit to reduce condensation.
By staying proactive, you can extend the life of your mini fridge and prevent common issues. I make it a habit to do a quick check every season, and it’s helped me avoid surprises.
Frequently Asked Questions (FAQ)
Why is water pooling under my mini fridge?
This is often due to a clogged drain hose or a faulty door seal. Start by cleaning the drain and inspecting the gasket for gaps.
Can I fix a leaking mini fridge myself?
Yes, many leaks are easy to fix with basic tools. Follow the steps in this guide, but if you’re unsure, seek professional help.
How often should I maintain my mini fridge?
I recommend a quick clean every 3-6 months to prevent buildup and ensure efficient operation.
What if the leak is coming from the back?
This could be related to the condenser or drain system. Check for blockages and ensure the fridge is level.
Is a leaking mini fridge dangerous?
While not immediately hazardous, it can lead to water damage or electrical issues if ignored. Always unplug it before inspecting.
Conclusion
Fixing a leaking mini fridge is a manageable task that can save you time and money. From my experience, starting with simple checks like cleaning and unclogging often resolves the issue. Remember, the key is to approach it calmly and methodically. I hope this guide empowers you to handle your appliance repair with confidence. If you have any stories or tips of your own, I’d love to hear them feel free to share in the comments below. Happy fixing!
“Taking care of small problems early prevents bigger ones later,” adds David Lee, a DIY enthusiast.
This final quote sums up why I believe in tackling repairs head-on. With a little effort, you can keep your mini fridge running smoothly for years to come.

Hi, I’m the lead researcher and appliance enthusiast behind RefrigeratorSolve. With years of hands-on experience troubleshooting cooling systems and testing home appliances, I am dedicated to bringing you honest reviews, energy-saving tips, and practical solutions to keep your refrigerator running perfectly.