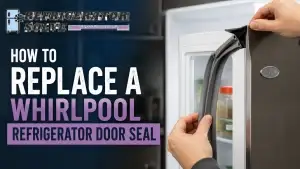
To replace the door seal on a Samsung refrigerator, open the door, peel back the old gasket starting from a corner, align the new OEM gasket into the door liner groove, and press it firmly into place. No tools are needed for most Samsung models. The full process takes 15–30 minutes.
Is your Samsung refrigerator running longer than usual? Feeling warm air near the door? A worn or torn door seal could be the culprit. A failing gasket forces your compressor to work overtime, drives up your electricity bill, and puts your food at risk of spoiling faster than it should.
Samsung refrigerators are among the most popular in North America, but their door seals have a few brand-specific quirks that most generic guides completely miss. The press-fit gasket system used on most Samsung models is different from the screw-retainer systems found on Whirlpool or GE units, which means the replacement process looks different too.
In this guide, you will learn exactly how to identify your Samsung model number, find the correct OEM replacement gasket, remove the old seal without damaging your door liner, install the new one correctly, and avoid the three most common mistakes Samsung owners make during this repair.
Why a Failing Samsung Door Seal Is a Bigger Problem Than You Think
A small crack or gap in your Samsung refrigerator door seal does more damage than most people realize. Warm, humid air enters continuously whenever the seal fails, even when the door is fully closed. Your Samsung’s digital inverter compressor has to compensate by running longer cooling cycles, consuming more energy and wearing down faster.
Samsung French door and side-by-side models are especially vulnerable to seal failure along the bottom corners of the freezer door. The constant weight of a heavy freezer drawer pulling down on the lower door gasket creates stress points that crack over time. Samsung twin cooling models (where the fridge and freezer operate on separate evaporators) can mask the problem longer, one compartment may still feel cold while the other silently loses efficiency.
Did You Know: A refrigerator door seal that fails to create a complete vacuum allows warm air to enter constantly, which can raise the internal temperature enough to accelerate food spoilage, even when the displayed temperature reading looks normal.
Food safety is a real concern here. Your Samsung may display 37°F (3°C) on its panel while the actual internal temperature near the door zones creeps up to 45°F (7°C) or higher due to warm air infiltration. Dairy products, deli meats, and leftovers are the first to be affected.
The good news: Samsung door seals are among the easiest to replace at home because most models use a press-fit design with no screws or retaining strips.
How to Replace Door Seal on Samsung Refrigerator: 6 Methods
Method 1: Full Gasket Replacement (Press-Fit Models — Most Common)
Best for: Samsung French door, side-by-side, and top-freezer models made after 2015 that use a press-fit gasket system with no visible screws.
How to do it:
- Open the refrigerator door fully and locate the existing gasket around the door perimeter.
- Starting at a top corner, grip the gasket firmly and pull it outward and away from the door liner channel — it will unclip from the groove with steady pressure.
- Work around all four sides, pulling the old gasket free. Do not use a screwdriver or blade — you will crack the plastic liner.
- Soak the new OEM gasket in warm water for 10–15 minutes to make it pliable and easier to seat.
- Align the new gasket at the top corner and press the ribbed edge firmly into the door liner groove.
- Work around the door in sections, pressing every 3–4 inches to seat the gasket fully. Pay extra attention to the bottom corners.
- Close the door and run your hand along the seal perimeter, you should feel no air escaping.
Expected result: A tight, airtight seal that eliminates warm air infiltration and reduces compressor run time within 24 hours.

Method 2: Screw-Retainer Replacement (Older Samsung Models)
Best for: Samsung refrigerators manufactured before 2012, particularly older side-by-side models such as the RS261MDWP and similar series, which use a retaining strip secured by Phillips screws.
How to do it:
- Open the door and locate the retaining strip running along the inner edge of the gasket.
- Use a Phillips #2 screwdriver to loosen do not fully remove, the screws along the retaining strip (approximately every 4–6 inches).
- Slide the old gasket out from under the retaining strip starting at a corner.
- Slide the new gasket under the retaining strip in the same channel.
- Straighten and align the gasket evenly around the full door perimeter.
- Tighten the retaining screws firmly but not aggressively — overtightening cracks the liner.
- Check alignment and close the door to test the seal.
Expected result: A correctly secured gasket that sits flush against the door frame on all sides.

Method 3: Samsung French Door Lower Drawer Seal Replacement
Best for: Samsung French door models (RF28, RF23, RF4 series) where the lower freezer drawer gasket has cracked or peeled away from the bottom corners.
How to do it:
- Pull the freezer drawer fully open.
- Locate the gasket running around the drawer frame opening on the refrigerator cabinet (not on the drawer itself).
- Pull the gasket away from its channel starting at a top corner, this gasket clips into the cabinet frame, not the drawer.
- Order a replacement using your model number, French door drawer gaskets are NOT interchangeable with door gaskets from the same model.
- Press the new gasket into the cabinet frame channel starting at the top and working down both sides.
- Ensure the bottom corners seat completely this is where Samsung French door seals fail most often.
- Close the drawer and check the seal by sliding a piece of paper around the perimeter; it should resist pulling.
Expected result: Elimination of frost buildup inside the freezer drawer and improved temperature stability in the fresh food compartment.
Method 4: Partial Seal Repair with Gasket Adhesive
Best for: Minor tears, peeling corners, or small sections of loose gasket on Samsung models where replacement parts have a long lead time.
How to do it:
- Clean the affected area thoroughly with warm soapy water and dry completely.
- Apply a thin bead of food-safe silicone gasket sealant (such as Loctite Clear Silicone Waterproof Sealant) under the peeling section.
- Press the gasket firmly back into position and hold for 60 seconds.
- Use painter’s tape to hold the repair in place overnight (at least 8 hours).
- Remove the tape and test the seal with the paper slip test.
Expected result: A temporary fix that restores the seal for 2–6 months while you source a proper OEM replacement.
Method 5: Samsung SmartThings Diagnostic Check Before Replacing
Best for: Samsung WiFi-connected refrigerators (Family Hub models and WiFi-enabled RS and RF series) where you suspect a door seal issue but want confirmation before ordering parts.
How to do it:
- Open the SmartThings app on your smartphone and select your Samsung refrigerator.
- Navigate to “Diagnostics” or “Energy” in the app dashboard.
- Check compressor run-time patterns — abnormally long or frequent cycles indicate warm air entry.
- Review door open/close event logs — false door-open alerts can indicate a sensor fault, not a gasket fault.
- If compressor run-time is elevated but door logs show normal usage, a gasket inspection is your next step.
- Run the paper slip test on all door edges to confirm the seal location.
Expected result: Confident diagnosis before spending money on replacement parts.
Method 6: Professional Samsung Authorized Service
Best for: Samsung refrigerators still under warranty (Samsung offers a 1-year parts and labor warranty, with 5-year coverage on the digital inverter compressor) or Family Hub models where door panel electronics are integrated near the gasket.
How to do it:
- Locate your model number (see Step-by-Step Guide below for exact location).
- Visit Samsung’s official support portal or call Samsung Support at 1-800-SAMSUNG.
- Confirm warranty status using your model and serial number.
- Schedule an authorized technician visit — Samsung’s technicians carry OEM gaskets for common RF and RS series models.
- Request a written service report documenting the gasket replacement for your records.
Expected result: Warranty-covered repair with OEM parts and no risk of voiding remaining coverage.
Step-by-Step Guide: How to Find Your Samsung Model Number and Correct Gasket Part
- Open the fresh food door and look along the inner door frame — the model number sticker on most Samsung refrigerators is on the upper left interior wall of the fresh food compartment.
- On side-by-side models, check the left interior wall near the top. On some RS series units, it may also appear behind the crisper drawers on the back wall.
- Record the full model number — for example, RF28R7351SR or RS28A500ASR. The first two letters (RF = French door, RS = side-by-side, RT = top-freezer) tell you the door configuration.
- Identify the gasket part number format — Samsung OEM gaskets use a DA97-XXXXX part number format. For example, DA97-12650A fits several RF28 series models. Always verify with your full model number before ordering.
- Search Samsung Parts (parts.samsung.com) or authorized dealers using your model number — do not substitute a third-party gasket if your refrigerator is under warranty.
- Check the production date on the same sticker — models produced before 2012 likely use the screw-retainer system; 2012 and later almost always use press-fit.
- Measure your existing gasket if the part number is unclear: measure the door height and width in inches, and confirm with the parts supplier that the gasket dimensions match.
- Order and allow the gasket to reach room temperature before installation — a cold gasket from shipping is stiff and difficult to seat properly.
Expert Tips and Common Mistakes
- Warm the new gasket before installation by soaking it in hot (not boiling) water for 15 minutes or leaving it in a warm room for an hour — a pliable gasket seats far more evenly than a stiff one straight from the box.
- Use the dollar bill test to check seal quality after installation — insert a dollar bill at multiple points around the door and close it; you should feel moderate resistance when pulling it out. No resistance means a gap.
- Samsung Family Hub models have a right-side door hinge adjustment screw — if your new gasket seals the left side but not the right, adjust the lower hinge pin a quarter-turn clockwise before assuming the gasket is defective.
- Always let the refrigerator stabilize for 24 hours after gasket replacement before evaluating compressor performance — the refrigerator needs time to re-establish its internal temperature after the repair.
- For Samsung twin cooling models, replace both the fresh food and freezer door gaskets at the same time if one has failed — if one has aged enough to fail, the other is close behind, and labor costs are the same.
Common Mistakes to Avoid
- Using a sharp tool to remove the old gasket — many Samsung owners use a flathead screwdriver to pry the gasket out, which cracks the plastic door liner channel. A cracked liner cannot hold the new gasket and turns a $25 repair into a $200+ door liner replacement.
- Ordering a gasket by door size alone instead of model number — Samsung French door refrigerators of the same physical size use different gaskets across model years. A gasket from an RF28 (2018) will not correctly fit an RF28 (2022) even though the door dimensions look identical.
- Skipping the corner press during installation — the four corners of a Samsung press-fit gasket are the hardest to seat and the first to fail. Many owners press the flat sections firmly but leave the corners slightly raised, creating air gaps that appear only when the door is fully closed.
- Ignoring the door alignment after gasket replacement — a new gasket on a misaligned door will compress unevenly, failing prematurely on one side. After installation, check that the door sits level and adjust the leveling legs if needed before calling the repair complete.
FAQs
How do I know if my Samsung refrigerator door seal needs replacing?
Close the door on a piece of paper or a dollar bill. If you can pull it out with no resistance, your seal has lost its grip. Visible cracks, tears, mold that cannot be cleaned away, or a door that feels loose when you push it closed are also clear signs the gasket needs replacement. A running compressor that never seems to shut off is another strong indicator.
What is the Samsung OEM gasket part number format?
Samsung OEM gaskets use the DA97-XXXXX format. Common examples include DA97-12650A for several RF28 French door models and DA97-07565B for some RS side-by-side units. Always match the part number to your specific model number — the same refrigerator line can use different gaskets across production years.
Can I replace a Samsung refrigerator door seal myself without tools?
Yes — most Samsung refrigerators produced after 2012 use a press-fit gasket system that requires no tools at all. You simply pull the old gasket out of its channel and press the new one in. Older models with screw-retainer strips require only a Phillips #2 screwdriver. The full replacement typically takes 15–30 minutes.
Why is my Samsung refrigerator door seal hot to the touch?
A warm or hot door seal on a Samsung refrigerator is normal and by design. Samsung runs a low-voltage heating element through the door frame gasket area on many models (particularly side-by-side and French door units) to prevent condensation from forming on the exterior door edges. If the seal feels excessively hot — uncomfortable to hold — that may indicate the anti-sweat heater circuit is malfunctioning, not the gasket itself.
How long does a Samsung refrigerator door seal last?
With normal use, a Samsung door gasket lasts 5–10 years. Seals on freezer doors tend to wear faster than fresh food door seals because of the greater temperature differential and the frequency of opening. Heavy use, cleaning with harsh chemicals, or UV exposure in a garage or direct sunlight environment can shorten gasket life significantly.
Will a third-party gasket work on my Samsung refrigerator?
A third-party gasket can work in terms of fit, but Samsung’s OEM gaskets use a specific magnetic strip strength and rubber durometer calibrated for their door weight. Some aftermarket gaskets use weaker magnets that pass the paper test when new but lose their grip within 12–18 months. If your refrigerator is still under warranty, using a non-OEM part may void coverage — use Samsung-certified parts during the warranty period.
What should I do if my new Samsung door seal won’t stay in place?
First, confirm the gasket is the correct part number for your model, a slightly oversized gasket will bow outward and pop out of the channel. Second, try heating the gasket with a hair dryer on low heat while pressing it into the groove, this softens the rubber and helps it conform to the channel shape. If it still won’t stay, the door liner channel may be cracked or warped and will need professional assessment.
Conclusion
Replacing the door seal on a Samsung refrigerator is one of the most impactful home appliance repairs you can do yourself. A new, correctly installed gasket restores your refrigerator’s energy efficiency, protects your food at safe temperatures, and extends the life of your compressor. The key is getting the right DA97-series OEM part number for your specific Samsung model, warming the gasket before installation, and pressing every corner completely into the door liner channel.
Whether you have a French door RF series, a side-by-side RS series, or an older top-freezer model, the principles in this guide apply directly to how to replace the door seal on a Samsung refrigerator. Today’s action: open your Samsung, find the model number sticker on the upper left interior wall, and check your current gasket with the dollar bill test. If it slides out freely, your seal is ready for replacement.
For more refrigerator tips and appliance guides, explore more at refrigeratorSolve.

Hi, I’m the lead researcher and appliance enthusiast behind RefrigeratorSolve. With years of hands-on experience troubleshooting cooling systems and testing home appliances, I am dedicated to bringing you honest reviews, energy-saving tips, and practical solutions to keep your refrigerator running perfectly.