Electrolux refrigerator door gasket replacement involves removing the damaged door seal, cleaning the gasket channel, installing a compatible replacement seal, and checking the door alignment. A properly installed gasket helps restore cooling performance, reduce frost issues, and improve refrigerator efficiency.
A refrigerator door that does not seal properly can create frustrating problems. You may notice warm food, excess frost, longer compressor running time, or moisture collecting around the door. In many cases, the issue is not the cooling system itself, it is a worn or damaged door gasket.
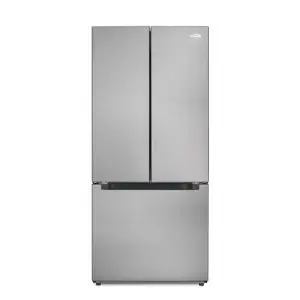
Electrolux refrigerators are known for their European-style engineering and advanced cooling technology. However, even well-built appliances develop gasket problems over time. Electrolux door seals are particularly vulnerable to hardening in low-humidity environments and loosening at corner points due to the brand’s characteristic wider door design on French door and counter-depth models.
Knowing the specific failure patterns of Electrolux gaskets helps you diagnose the problem faster and choose the correct replacement approach.
Replacing the gasket is one of the most practical refrigerator maintenance tasks you can do. With the correct replacement part, basic tools, and careful installation, you can restore your refrigerator’s sealing performance without replacing the entire appliance.
In this guide, you will learn why gasket problems happen, how to perform an Electrolux refrigerator door gasket replacement correctly, common mistakes to avoid, expert maintenance tips, and answers to common refrigerator seal questions.
Why Electrolux Refrigerator Door Gasket Problems Matter
A damaged refrigerator door gasket affects more than just the door seal. When cold air escapes, your appliance has to work harder to maintain the correct temperature. This can lead to higher energy use, inconsistent cooling, and faster food spoilage.
Many homeowners first notice gasket problems when milk spoils faster than expected, vegetables lose freshness, or the freezer develops unusual ice buildup. Another common sign is a refrigerator door that feels loose or does not close smoothly.
A refrigerator should maintain a stable temperature range for safe food storage. Most refrigerators perform best when the fresh food section stays around 37°F (3°C) and the freezer remains near 0°F (-18°C).
A failing gasket can also create condensation. Moisture around the refrigerator door edge often indicates that warm air is entering through small gaps.
Did You Know: Refrigerator door seals work by creating an airtight barrier that helps maintain internal temperatures and reduces unnecessary cooling cycles.
Electrolux refrigerators manufactured after 2015 commonly use a press-fit gasket channel system, meaning the door seal snaps directly into a groove without visible screws. Older Electrolux models, particularly those made before 2012, often use a retaining strip secured with hex screws along the inner door liner.
Identifying which system your model uses before starting the replacement saves significant time and prevents accidental damage to the door panel. Your model number, found on the label inside the fresh food compartment along the upper left wall, will confirm which gasket design applies to your specific appliance.
Electrolux refrigerators are designed with advanced cooling systems, but even smart features and modern compressors cannot compensate for a poor door seal. Proper refrigerator maintenance includes checking the gasket regularly, keeping the sealing surface clean, and replacing worn parts when needed.
Best Solutions for Electrolux Refrigerator Door Gasket Replacement
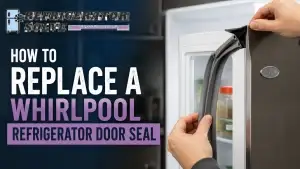
Replace the Damaged Door Gasket
Best for: Homeowners who notice cracks, gaps, loose corners, or visible damage on the refrigerator seal.
How to do it:
- Identify your Electrolux refrigerator model number from the inside wall or door frame and purchase a compatible replacement gasket designed for that model.
- Remove items from the door shelves and loosen the gasket screws or retaining strip depending on your refrigerator design.
- Pull out the old gasket carefully, clean the gasket channel with warm water, and install the new seal evenly around the door.
- Soak the new Electrolux replacement gasket in warm water for 5 to 10 minutes before installation to increase flexibility and make fitting easier.
- Begin pressing the new gasket into the channel starting from the top corners, working downward along both sides evenly.
- Press firmly along the entire channel or retaining strip to eliminate any loose sections, bubbles, or misaligned corners.
- If your model uses screws, tighten them evenly in a cross pattern — do not overtighten as this can compress and damage the new seal.
Expected result: The refrigerator door creates a stronger seal, reducing cold air leaks and improving cooling consistency.
Warm and Reshape a Deformed Gasket
Best for: Gaskets that are not torn but have bends, wrinkles, or areas that do not touch the refrigerator frame.
How to do it:
- Use a hair dryer on a low heat setting to gently warm the uneven gasket area for a few minutes.
- Press the gasket into the correct shape while it is flexible.
- Close the refrigerator door and allow the seal to cool in position.
Expected result: Minor gasket distortions can often be corrected without full replacement.
Clean the Gasket and Door Contact Area
Best for: Refrigerators with weak sealing caused by dirt, food residue, or sticky buildup.
How to do it:
- Mix mild dish soap with warm water and wipe the entire gasket surface.
- Clean the refrigerator cabinet area where the gasket touches the frame.
- Dry the seal completely before closing the door.
Expected result: A clean gasket can create better contact and improve door sealing.
Check Refrigerator Door Alignment
Best for: Doors that appear uneven, sag downward, or reopen after closing.
How to do it:
- Inspect the refrigerator hinges and check whether the door sits level with the cabinet.
- Tighten loose hinge screws using the correct screwdriver.
- Adjust the door position according to the refrigerator service instructions if needed.
Expected result: Proper alignment helps the new gasket seal evenly around the entire door.
Test the Door Seal With Paper
Best for: Checking whether your Electrolux refrigerator gasket is leaking.
How to do it:
- Place a piece of paper between the gasket and refrigerator frame.
- Close the door and gently pull the paper.
- Repeat this test around different areas of the door.
Expected result: A strong gasket should hold the paper firmly instead of allowing it to slide out easily.
Lubricate the Gasket to Extend Seal Life
Best for: Homeowners who want to maintain gasket flexibility and prevent premature hardening after replacement.
How to do it:
- After installing and confirming the new gasket seals correctly, apply a very thin layer of food-safe petroleum jelly or silicone-based lubricant along the gasket surface using a soft cloth
- Focus on the corner areas where gaskets tend to stiffen and crack first
- Wipe away any excess lubricant to avoid attracting dirt or affecting door closing action
- Repeat this maintenance step every 3 to 6 months as part of regular refrigerator care
Expected result: Regular lubrication keeps the rubber seal flexible, improves door contact, and extends the gasket lifespan significantly compared to unmaintained seals.
Step-by-Step Guide: How to Replace an Electrolux Refrigerator Door Gasket
- Find the correct replacement gasket
Check your Electrolux refrigerator model number and match the gasket size before purchasing. - Turn off refrigerator power if needed
Disconnect power when working around internal door components for safer handling. - Remove stored items from the door
Empty door shelves to reduce weight and make removal easier. - Inspect the old gasket installation
Look for screws, clips, or a retaining strip holding the gasket in place. - Remove the damaged gasket carefully
Avoid damaging the inner door liner while pulling the old seal away. - Clean the gasket area completely
Remove dirt, grease, and residue using warm water and mild soap. - Install the new gasket evenly
Start from the corners and press the gasket into position around the full door edge. - Test the refrigerator seal
Check the door closing action, perform a paper test, and monitor temperature for the next 24 hours.
A correctly installed gasket should allow the door to close smoothly while maintaining stable cooling performance.
Expert Tips and Common Mistakes
- Check the gasket every few months and clean it before buildup affects sealing performance.
- Keep refrigerator temperature near 37°F (3°C) for efficient cooling and food storage.
- Avoid pulling the door open repeatedly with excessive force because it can damage the seal.
- Use manufacturer-compatible replacement parts instead of universal seals that may not fit correctly.
- Inspect door hinges during gasket replacement because alignment problems can damage a new gasket.
Common Mistakes to Avoid
- Installing the wrong gasket model: A seal that looks similar may not match your Electrolux refrigerator door size and can create air leaks.
- Skipping gasket cleaning: Dirt between the gasket and door frame prevents proper contact and reduces sealing performance.
- Using excessive heat during reshaping: High heat from tools can damage the rubber material permanently.
- Ignoring door alignment issues: A new gasket cannot seal properly if the refrigerator door hangs unevenly.
FAQs
How do I know if my Electrolux refrigerator door gasket needs replacement?
A damaged gasket usually shows cracks, gaps, hard rubber areas, or visible air leaks. You may also notice frost buildup, moisture around the door, or the refrigerator running longer than normal. A paper test around the door edge can help confirm weak sealing areas.
Where is the model number on an Electrolux refrigerator?
On most Electrolux refrigerators, the model number label is located inside the fresh food compartment on the upper left side wall or along the ceiling of the compartment near the back. Some models have the label on the door frame area instead. The model number typically begins with letters such as EI, EW, or E followed by a series of numbers. You must have this number before ordering a replacement gasket as Electrolux seals are model-specific.
How much time does Electrolux refrigerator door gasket replacement take?
Most homeowners can complete the replacement in about 30 to 60 minutes depending on the refrigerator model and gasket design. Cleaning the gasket area and carefully fitting the new seal usually takes the most time.
Can I fix an Electrolux refrigerator gasket without replacing it?
Yes, minor issues like folds, dirt buildup, or small shape problems may be corrected with cleaning or gentle warming. However, cracked, torn, or hardened gaskets usually need replacement for proper sealing.
What temperature should my refrigerator maintain after gasket replacement?
After replacing the gasket, the refrigerator should typically maintain around 37°F (3°C) in the fresh food section and approximately 0°F (-18°C) in the freezer for proper performance.
Why is my Electrolux refrigerator door not sealing after gasket replacement?
Common causes include incorrect gasket installation, poor door alignment, trapped folds in the seal, or loose hinges. Check the gasket position around all corners and make sure the door closes evenly.
Do smart refrigerators need gasket maintenance?
Yes. Modern smart refrigerators with connected features, sensors, and advanced cooling systems still depend on a properly sealed door gasket to maintain stable temperatures and efficient operation.
Conclusion
A properly working door gasket is essential for keeping your refrigerator cold, efficient, and reliable. A damaged Electrolux refrigerator door gasket can lead to cooling problems, moisture buildup, frost issues, and unnecessary appliance strain.
Replacing the gasket, cleaning the sealing surface, checking door alignment, and following correct installation steps can significantly improve refrigerator performance. Regular refrigerator maintenance also helps protect food quality and extends appliance life.
Learning how to handle an Electrolux refrigerator door gasket replacement gives you a practical solution for one of the most common refrigerator problems. Start by inspecting your gasket today and check for cracks, gaps, or weak sealing areas.
For more refrigerator tips and appliance guides, explore more at refrigeratorSolve.

Hi, I’m the lead researcher and appliance enthusiast behind RefrigeratorSolve. With years of hands-on experience troubleshooting cooling systems and testing home appliances, I am dedicated to bringing you honest reviews, energy-saving tips, and practical solutions to keep your refrigerator running perfectly.