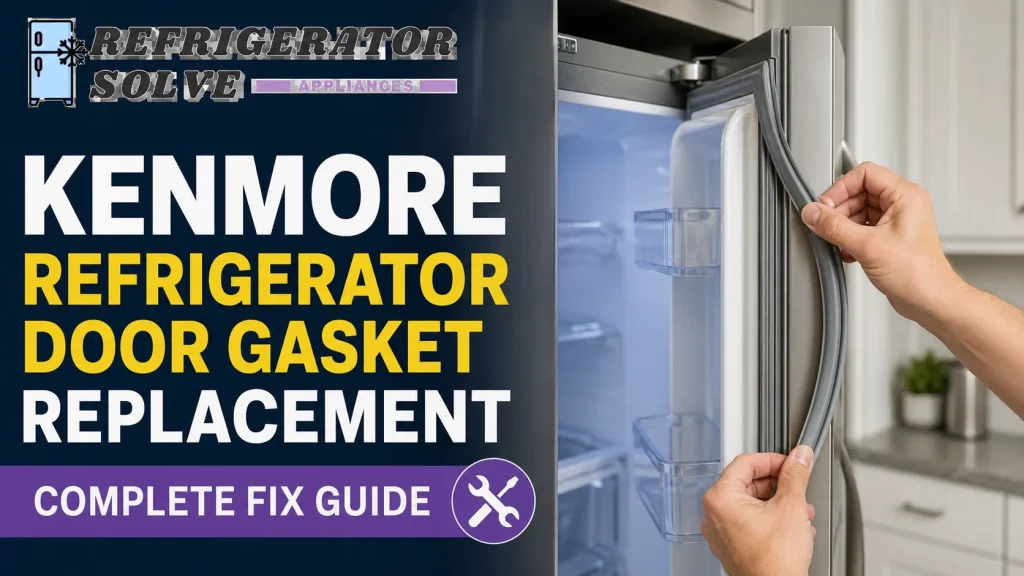
Kenmore refrigerator door gasket replacement is needed when the seal becomes cracked, loose, or unable to hold cold air inside. Replacing the gasket correctly helps restore cooling performance, reduce energy waste, and prevent frost or moisture problems around your refrigerator door.
A refrigerator door that does not close tightly can create bigger problems than most homeowners expect. If your Kenmore refrigerator is running constantly, food is spoiling faster, or you notice condensation around the door, the damaged door gasket may be the reason.
The door gasket works as an airtight barrier between the refrigerator cabinet and the outside environment. Over time, it can become stiff, warped, dirty, or damaged due to frequent opening, temperature changes, and normal appliance use.
Many people think a weak refrigerator seal means they need a new refrigerator. In many cases, replacing the gasket is a simpler and more affordable repair that can improve performance immediately.
In this guide, I will explain how to identify a bad Kenmore refrigerator door gasket, choose the correct replacement, install it properly, avoid common mistakes, and maintain your refrigerator seal for longer-lasting cooling performance.
Why Kenmore Refrigerator Door Gasket Problems Matter
A refrigerator door gasket may look like a simple rubber strip, but it plays an important role in temperature control. When the seal fails, warm air enters the refrigerator while cold air escapes.
This can cause several everyday problems:
- Refrigerator runs longer than normal
- Higher electricity usage
- Ice buildup inside the freezer
- Food storage temperature becomes unstable
- Moisture appears around the refrigerator door
- Compressor works harder
A properly working refrigerator should maintain a stable temperature, usually around 37°F (3°C) for the refrigerator section and 0°F (-18°C) for the freezer.
If your Kenmore appliance cannot maintain these temperatures because of a damaged gasket, other parts may experience extra stress.
Did You Know: Most refrigerators perform best when the door seal creates a complete airtight connection. A small gap around the gasket can affect cooling efficiency and temperature stability.
Before replacing the gasket, check whether the problem is actually caused by dirt, improper alignment, or a damaged seal. Sometimes a simple cleaning or adjustment can restore the door seal.
Best Solutions for Kenmore Refrigerator Door Gasket Replacement
Replace the Damaged Kenmore Door Gasket
Best for: Homeowners with a cracked, torn, hardened, or visibly damaged refrigerator door seal.
How to do it:
- Find the model number inside the refrigerator compartment or on the manufacturer label.
- Purchase a compatible Kenmore refrigerator door gasket designed for your exact model.
- Remove the old gasket by loosening the retaining screws or pulling it from the gasket channel, depending on the refrigerator design.
- Warm the new gasket by soaking it in warm water for 5 to 10 minutes before installation. This makes the rubber more flexible and easier to fit.
- Start pressing the new gasket into place from the top corners, working your way down both sides evenly.
- Press firmly along the entire channel to ensure there are no loose sections or gaps.
Expected result: A new gasket creates a stronger seal and helps your refrigerator maintain stable temperatures.
Clean and Restore the Existing Door Gasket
Best for: Refrigerators where the gasket is dirty but not physically damaged.
How to do it:
- Mix warm water with mild dish soap and clean the entire gasket surface.
- Use a soft cloth or toothbrush to remove food particles from gasket folds.
- Dry the gasket completely and check if the door closes evenly.
Expected result: Removing dirt and debris can improve sealing performance without replacing the gasket.
Soften a Warped Refrigerator Door Seal
Best for: Kenmore refrigerators where the gasket is bent or compressed but still in good condition.
How to do it:
- Use a hair dryer on the lowest heat setting, holding it at least 6 inches away from the gasket surface. Apply heat in slow, sweeping motions for 20 to 30 seconds at a time. Avoid holding the dryer in one spot as concentrated heat can damage the rubber material.
- Slowly reshape the rubber seal with your hands.
- Allow the gasket to cool while maintaining the correct shape.
Expected result: The gasket may return to its original shape and improve door contact.
Adjust the Refrigerator Door Alignment
Best for: Doors that are not closing properly even with a good gasket.
How to do it:
- Check whether the refrigerator door sits unevenly compared with the cabinet.
- Inspect the door hinges and tighten loose screws.
- Adjust leveling feet if the refrigerator is leaning forward.
Expected result: Proper alignment allows the gasket to touch the refrigerator frame evenly.
Test the Door Seal With a Paper Test
Best for: Checking whether your Kenmore refrigerator gasket is losing suction.
How to do it:
- Place a piece of paper between the gasket and refrigerator frame.
- Close the door normally.
- Pull the paper gently and check resistance around different areas.
Expected result: A strong gasket should grip the paper firmly in most sections.
Check and Replace the Door Hinge If Needed
Best for: Kenmore refrigerators where the door sags or does not align properly after gasket replacement.
How to do it:
- Open the refrigerator door fully and inspect the top and bottom hinges for visible bending, rust, or loose mounting screws
- Tighten any loose hinge screws using a Phillips or hex screwdriver depending on your Kenmore model
- If the hinge itself is bent or cracked, order a replacement hinge using your model number from a Kenmore parts supplier or appliance parts retailer
- Replace the hinge before installing a new gasket, a sagging door will prevent even the best gasket from sealing correctly
Expected result: A properly aligned door allows the gasket to make full contact with the refrigerator frame on all four sides, maximizing sealing performance.
Use a Refrigerator Temperature Monitor After Replacement
Best for: Users who want to confirm the refrigerator is cooling correctly.
How to do it:
- Place a refrigerator thermometer in the middle shelf area.
- Check temperature after 24 hours of normal operation.
- Adjust refrigerator settings if needed to maintain around 37°F (3°C).
Expected result: You can verify that the new gasket restored proper cooling conditions.
Step-by-Step Guide: How to Replace a Kenmore Refrigerator Door Gasket
1. Confirm the Correct Replacement Gasket
Find your Kenmore refrigerator model number before ordering a replacement. Door gaskets are not universal, and the wrong size may create another sealing problem.
2. Prepare the Refrigerator Door
Remove items from the door shelves. This reduces weight and makes installation easier.
3. Remove the Old Gasket
Check your Kenmore model number first, it is usually found on a label inside the refrigerator compartment, along the top or side wall. Models manufactured before 2010 typically use retaining screws hidden under the gasket lip.
Newer Kenmore models usually use a press-fit channel system where the gasket snaps directly into a groove without screws. If you see a visible screw line under the gasket edge, use a Phillips screwdriver to loosen each screw evenly before pulling the gasket free.
Avoid damaging the inner door liner.
4. Clean the Gasket Area
Use warm water and mild soap to remove dirt, food residue, and old buildup around the mounting area.
Allow the surface to dry.
5. Install the New Gasket
Start from the top corners and press the gasket evenly into place. Make sure there are no twisted sections.
6. Tighten Screws or Secure the Channel
If your Kenmore model uses screws, tighten them evenly. Do not overtighten because it can damage the gasket.
7. Check the Door Closing
Close the door slowly and inspect all four sides of the gasket. The seal should touch the refrigerator cabinet completely.
8. Monitor Refrigerator Performance
Wait at least 24 hours and check cooling temperature, frost buildup, and compressor operation.
Expert Tips and Common Mistakes
Pro Tips:
- Warm the new gasket before installation: A flexible gasket fits better than a cold, stiff one.
- Clean the gasket monthly: Regular refrigerator maintenance prevents buildup that weakens sealing.
- Check door shelves: Overloaded shelves can push against the door and prevent proper closing.
- Keep refrigerator temperature stable: Extreme temperature adjustments can increase appliance stress.
- Use quality replacement parts: Genuine or properly matched Kenmore-compatible parts provide better fit and performance.
Common Mistakes to Avoid:
- Installing the wrong gasket model: A slightly incorrect gasket may look similar but fail to seal properly.
- Ignoring door alignment: A new gasket cannot fix a door that is hanging unevenly.
- Using harsh cleaners: Strong chemicals can damage the rubber material over time.
- Skipping the temperature check: A repaired door seal should always be followed by checking refrigerator performance.
FAQs
How do I know if my Kenmore refrigerator door gasket needs replacement?
A damaged gasket usually shows cracks, tears, gaps, stiffness, or poor suction. You may also notice frost buildup, moisture around the door, or the refrigerator running continuously. A paper test can help confirm whether the seal is weak.
Where do I find my Kenmore refrigerator model number?
The model number is printed on a label usually located inside the refrigerator compartment along the top wall, upper left side wall, or occasionally on the back exterior panel. It typically starts with a three-digit number followed by additional characters. You will need this number to order a compatible replacement gasket, as door seals are model-specific and not interchangeable between different Kenmore configurations.
How much time does Kenmore refrigerator door gasket replacement take?
Most homeowners can complete the replacement in about 30 minutes to 1 hour, depending on the refrigerator model and gasket design. Taking time to install it evenly is more important than rushing the process.
Can I replace a Kenmore refrigerator door gasket myself?
Yes, many Kenmore refrigerator gasket replacements can be completed with basic tools. The important steps are choosing the correct gasket, installing it evenly, and checking the seal after replacement.
What temperature should my Kenmore refrigerator maintain after gasket replacement?
A properly working refrigerator should usually maintain around 37°F (3°C) in the refrigerator section and about 0°F (-18°C) in the freezer section.
Why is my refrigerator still running after replacing the gasket?
The refrigerator may need several hours to stabilize after replacement. If it continues running excessively after 24 hours, check temperature settings, condenser cleanliness, airflow, and other cooling components.
How often should a refrigerator door gasket be replaced?
There is no fixed replacement schedule. A gasket should be replaced when it becomes damaged, loses flexibility, or no longer creates a proper seal.
Can a bad door gasket cause food spoilage?
Yes. A weak seal allows warm air inside, making it harder for the refrigerator to maintain safe storage temperatures. Monitoring temperature after repair helps protect food quality.
Conclusion
A properly working door seal is essential for keeping your Kenmore refrigerator efficient, organized, and reliable. A damaged gasket can lead to temperature problems, extra compressor workload, frost buildup, and wasted energy.
Replacing the gasket correctly is one of the most practical refrigerator maintenance tasks many homeowners can handle. With the right replacement part, careful installation, and proper temperature monitoring, your appliance can return to normal performance.
Understanding the signs of a failing seal helps you solve problems before they become expensive repairs. If your refrigerator door feels loose, leaks cold air, or shows moisture around the edges, checking the gasket should be one of your first steps.
For more refrigerator tips and appliance guides, explore more at refrigeratorSolve.

Hi, I’m the lead researcher and appliance enthusiast behind RefrigeratorSolve. With years of hands-on experience troubleshooting cooling systems and testing home appliances, I am dedicated to bringing you honest reviews, energy-saving tips, and practical solutions to keep your refrigerator running perfectly.