Refrigerator door seal replacement is one of the most effective ways to improve cooling performance, reduce energy waste, and prevent food spoilage. If your refrigerator door no longer closes tightly, replacing the worn gasket can restore efficiency and help your appliance last longer.
A refrigerator works hard every day to keep food fresh and safe. However, many homeowners overlook a simple component that plays a major role in cooling performance—the door seal. Also known as the refrigerator gasket, this flexible strip around the door creates an airtight barrier that keeps cold air inside and warm air outside.
When the gasket becomes cracked, loose, dirty, or warped, your refrigerator has to work much harder to maintain the correct temperature. This can lead to higher energy bills, inconsistent cooling, frost buildup, and spoiled food. Many people assume they need expensive repairs or even a new refrigerator when the real issue is simply a worn seal.
The good news is that a refrigerator door seal replacement is often an affordable DIY project. Whether you’re dealing with a leaking gasket or planning preventive maintenance, understanding how to replace refrigerator door seals can save money and improve appliance performance.
In this guide, you’ll learn why refrigerator seal replacement matters, signs of a failing gasket, step-by-step instructions for replacing refrigerator seals, expert maintenance tips, and answers to the most common questions homeowners ask.
Why Refrigerator Door Seal Replacement Matters
Your refrigerator door gasket serves a simple but critical purpose: maintaining an airtight seal. Without it, cold air escapes continuously.
According to the U.S. Department of Energy, faulty refrigerator door seals can significantly increase energy consumption because the compressor must run more often to maintain temperature. You can learn more about appliance efficiency through the official ENERGY STAR refrigerator efficiency resources.
Common signs you need a refrigerator gasket replacement include:
- Visible cracks or tears in the gasket
- Condensation around the door edges
- Frost accumulation inside the freezer
- Refrigerator running constantly
- Higher electricity bills
- Difficulty closing the door completely
- Food spoiling faster than normal
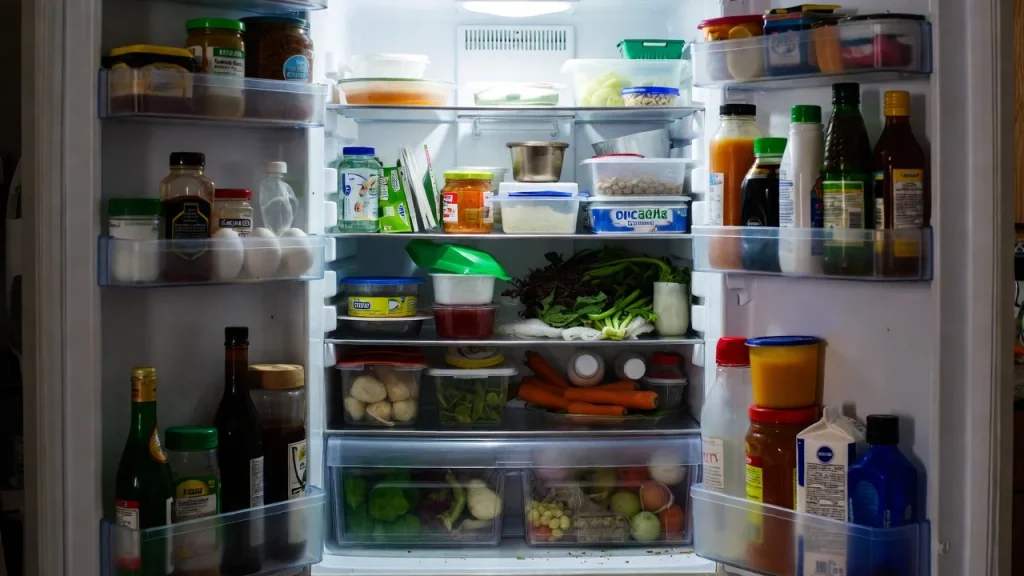
Imagine opening your refrigerator and noticing warm milk, soft vegetables, or excessive frost. Before calling a repair technician or buying a new appliance, check the door seal — in most cases, a $30–$50 gasket replacement is all you need to fix the problem completely. In many cases, these issues are caused by air leaks around the door rather than a major mechanical failure.
A replacement refrigerator door gasket can often restore factory-level efficiency and improve food preservation while extending appliance life.
Best Solutions for Refrigerator Door Seal Replacement
If you’re considering replacing a refrigerator seal, these practical recommendations can help ensure success.
1. Inspect the Entire Gasket
- Check for cracks, tears, and deformation.
- Look closely at corners where wear commonly occurs.
- Test for air leaks using a dollar-bill method.
2. Clean Before Replacing
- Dirt buildup can mimic gasket failure.
- Use warm water and mild soap.
- Remove grease and food particles.
3. Purchase the Correct Replacement
- Match the gasket to your refrigerator model.
- Use OEM parts whenever possible.
- Verify dimensions before ordering.
4. Improve Refrigerator Maintenance
- Clean door seals monthly.
- Inspect hinges regularly.
- Keep shelves organized to avoid forcing doors shut.
5. Test the Seal After Cleaning
Before ordering a replacement, clean the gasket thoroughly and test again. Sometimes dirt and grease cause false failure symptoms. Use warm soapy water and a soft cloth to clean all gasket surfaces.
6. Check Door Hinge Alignment
A misaligned door can prevent even a brand-new gasket from sealing properly. Before replacing the gasket, check that the door hangs evenly and closes without resistance. Adjust hinges if needed.
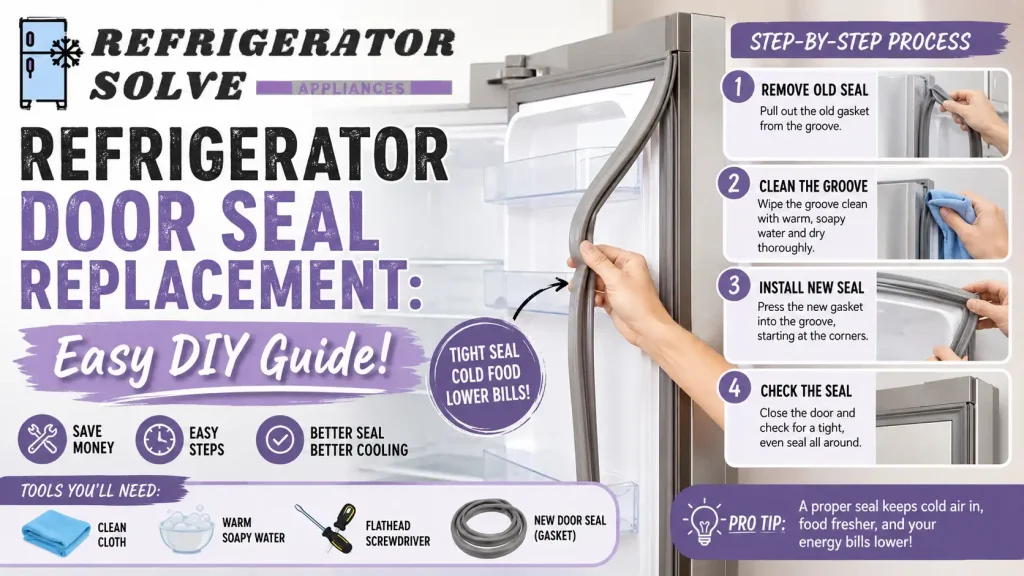
Step-by-Step Guide
1. Identify Your Refrigerator Model
Locate the model number on a sticker inside the refrigerator compartment, usually on the side wall or ceiling. It may also appear on the door frame edge or back panel. Write it down or take a photo — you will need it when searching for the correct replacement gasket online or at a parts store.
2. Order the Correct Gasket
Purchase the exact replacement gasket recommended by your manufacturer. Search using your model number on the manufacturer’s official website, authorized parts retailers, or appliance parts stores. Always choose OEM (Original Equipment Manufacturer) parts when possible — aftermarket gaskets may not fit perfectly and can cause ongoing seal problems. Verify the gasket dimensions match your door before ordering.
3. Unpack the New Seal
Remove the gasket from packaging and allow it to rest at room temperature for at least 30 minutes. If it feels stiff or has packaging creases, soak it in warm water for 5–10 minutes or use a hair dryer on low heat to make it flexible. A pliable gasket seats more evenly and reduces the chance of wrinkles after installation.
4. Remove the Old Seal
Start at one corner and gently pull the gasket away from the door channel. Use a flat-head screwdriver to loosen retaining screws — turn each screw slightly rather than removing fully to avoid warping the door frame. If the gasket feels stuck, apply warm water along the edge to loosen it. Take a photo before removal so you can replicate the exact seating during reinstallation.
5. Clean the Mounting Surface
Wipe the entire door channel with a cloth dampened in warm soapy water. Pay special attention to corners where grease and food residue collect. Dry the surface completely before installing the new gasket — moisture can prevent a proper seal and cause the gasket to slip during installation.
6. Install the New Gasket
Start at the top corner and press the gasket lip firmly into the door channel. Work down one side, then across the bottom, and up the other side. Press each section in with your fingers before moving to the next. Avoid stretching the gasket — if a section feels tight, back up slightly and re-seat from a few inches earlier. Check for kinks or twists as you go.
7. Tighten Fasteners Carefully
If your model uses retaining screws, tighten them in a cross pattern — start at one corner, move to the opposite corner, then fill in the remaining screws. Hand-tighten only; using too much force can distort the door frame and create new gaps. Check that the gasket sits flush along the entire edge before finishing.
8. Test the Seal
Place a dollar bill or sheet of paper between the door and the refrigerator frame, then close the door. Try to pull the paper out slowly. If it slides out easily with no resistance, the seal is weak and needs adjustment. If you feel firm resistance, the gasket is sealing properly. Repeat this test at multiple points around the entire door.
After installation, allow 24 hours for the gasket to fully conform to the refrigerator frame.
Expert Tips & Common Mistakes
Pro Tips
- Clean gaskets monthly to extend lifespan.
- Apply gentle heat using a hair dryer to remove wrinkles.
- Inspect corners regularly where wear appears first.
- Check door alignment before replacing the gasket.
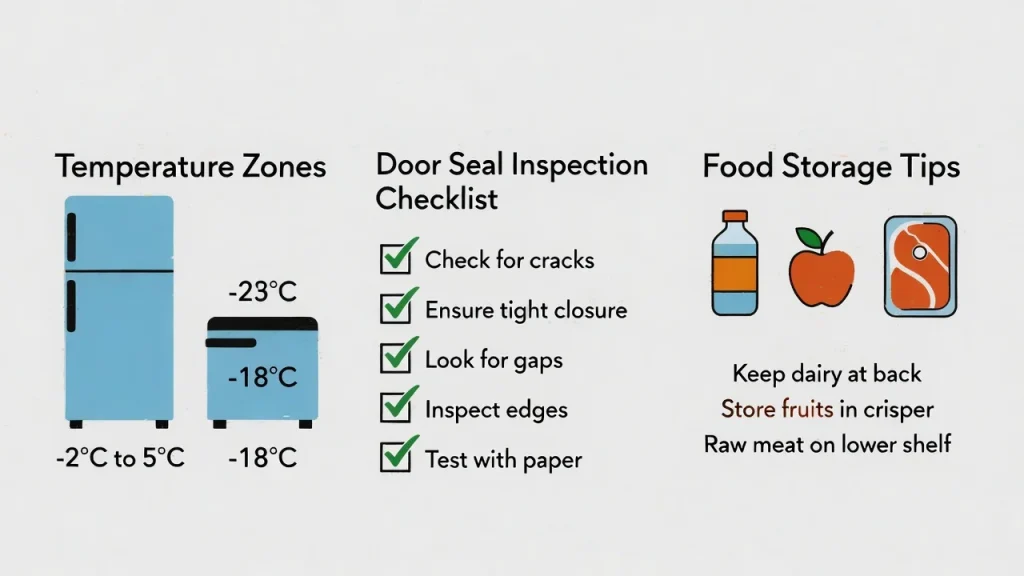
- Maintain proper refrigerator temperatures between 35°F and 38°F.
Common Mistakes to Avoid
- Installing the wrong gasket model.
- Ignoring damaged door hinges.
- Using harsh chemicals that damage rubber.
- Forcing the seal into place unevenly.
A properly installed refrigerator seal replacement can last several years with routine maintenance.
For food safety recommendations and refrigerator temperature guidelines, refer to the official USDA Food Safety and Inspection Service resources.
Troubleshooting: Still Leaking After Replacement?
Even after a careful installation, some issues can appear. Here is how to fix the most common problems:
- Gasket still has gaps at corners: Re-seat the corner sections by pressing firmly with your thumb. Apply gentle heat with a hair dryer to help the material conform to the curve.
- Door feels uneven: Check hinge alignment. A door that tilts even slightly will prevent a full seal. Loosen hinge screws, realign the door, and retighten.
- Frost still building up: Wait 24–48 hours after installation. New gaskets need time to fully conform to the frame. If frost persists after 48 hours, perform the dollar-bill test at all edges to find the exact leak point.
- Gasket keeps popping out: The gasket may be the wrong size for your model. Double-check the part number against your refrigerator model number.
FAQs
How do I know if I need refrigerator door seal replacement?
Signs include visible cracks, loose gasket sections, frost buildup, condensation around the door, rising energy bills, and food spoiling faster than expected.
Can I replace a refrigerator door seal myself?
Yes. Most homeowners can replace refrigerator door seals using basic tools. The process typically takes 30–60 minutes depending on the refrigerator model.
How much does refrigerator gasket replacement cost?
Replacement gaskets usually cost between $30 and $150, depending on the brand and model. Professional installation may add labor costs.
How long does a refrigerator gasket last?
Most refrigerator gaskets last 5–10 years with proper maintenance and regular cleaning.
Will replacing refrigerator seals lower energy bills?
Yes. A properly sealed refrigerator prevents cold air loss, helping the compressor run less frequently and improving energy efficiency.
Can a damaged gasket cause food spoilage?
Absolutely. Air leaks can create temperature fluctuations that shorten food shelf life and increase food safety risks.
What is the difference between refrigerator gasket replacement and refrigerator seal replacement?
There is no functional difference. Both terms refer to replacing the rubber seal around the refrigerator door that creates an airtight closure.
Conclusion
A refrigerator door seal replacement is one of the simplest yet most valuable maintenance tasks homeowners can perform. A worn gasket may seem like a minor issue, but it can lead to energy waste, food spoilage, excessive compressor wear, and higher utility costs.
By identifying gasket problems early and replacing refrigerator door seals when needed, you can improve cooling performance, maintain food safety, and extend the life of your appliance. Whether you’re performing a refrigerator gasket replacement yourself or hiring a professional, the investment typically pays for itself through better efficiency and reduced operating costs.
As refrigerator technology continues to improve, one thing remains constant — a properly sealed door is essential for energy efficiency and food safety. Regular gasket inspection and timely replacement remain the simplest ways to keep your refrigerator performing at its best.

Hi, I’m the lead researcher and appliance enthusiast behind RefrigeratorSolve. With years of hands-on experience troubleshooting cooling systems and testing home appliances, I am dedicated to bringing you honest reviews, energy-saving tips, and practical solutions to keep your refrigerator running perfectly.