To clean your mini fridge’s condenser coils, first unplug the unit, locate the coils (usually on the back or bottom), and gently remove dust and debris using a coil brush and a vacuum cleaner. This simple maintenance task is essential for keeping your fridge running efficiently and preventing costly repairs.
I’ll be honest with you. I learned the importance of this simple task the hard way. A few years ago, my trusted mini fridge in the home office started making a terrible groaning noise. It was running constantly, yet my drinks were never really cold. I was ready to call for an appliance repair, convinced the compressor was failing a death sentence for any refrigerator.
As a last resort, I pulled the fridge away from the wall and was horrified. The condenser coils on the back were completely blanketed in a thick, fuzzy coat of dust and pet hair. It looked like a grey sweater. After a quick clean, the noise stopped, the fridge cooled perfectly, and I felt a mixture of relief and foolishness. I’d almost thrown away a perfectly good appliance over a five-minute job I didn’t know existed.
That experience turned into a mission. I’ve since helped countless friends and family members with their own mini fridge maintenance, from a dusty model in a garage to one clogged with carpet fibers in a college dorm. This guide is born from that hands-on experience. I want to walk you through the entire process, making it feel less like a chore and more like a simple act of care for an appliance that works hard for you.
Why Cleaning Your Condenser Coils is a Big Deal

Think of your mini fridge’s condenser coils as its lungs. They need to be clear to “breathe.” Their job is to release the heat that the refrigeration system pulls from inside your fridge. When the coils are clogged with dirt, dust, and grime, that heat gets trapped. The entire system has to work much harder and longer to achieve the same cooling effect.
This leads to a cascade of problems:
- Reduced Energy Efficiency: A struggling fridge uses more electricity. You’re literally paying more on your energy bill for it to fight through the dirt.
- Poor Cooling Performance: This is the most obvious sign. Your food and drinks won’t get as cold as they should.
- Strange Noises: You might hear the compressor humming or groaning loudly as it strains.
- Shortened Appliance Lifespan: The extra strain on the compressor—the heart of the fridge—can cause it to burn out prematurely. Replacing a compressor often costs more than a new mini fridge.
Regular cleaning is a small investment of time that pays off in lower bills, reliable cooling, and a longer life for your appliance. It’s the most effective form of preventive maintenance you can do.
Step 1: Preparation and Safety First

Before we touch anything, safety is the absolute priority. Dealing with electricity and a somewhat heavy appliance requires caution.
- Unplug the Fridge: This is non-negotiable. Don’t just turn it off at the thermostat; pull the plug from the wall outlet. This eliminates any risk of electrical shock.
- Empty the Contents: Take everything out of the fridge and freezer. This is a great opportunity to check for expired items and wipe down the interior shelves with a mild cleaner.
- Choose Your Location: You’ll need space to work. Move the mini fridge to an open area, like the middle of the room or a well-ventilated garage. If it’s on a carpet, you might want to put down an old towel to catch any debris. Protect your flooring from scratches.
- Let It Warm Up (Optional but Helpful): If the coils are warm, any grease or sticky grime will be softer and easier to remove. I usually unplug it after it’s been running for a bit.
- Gather Your Cleaning Supplies: You don’t need fancy tools. Here’s what I use:
- A Vacuum Cleaner: Ideally with a brush attachment and a crevice tool. A handheld vacuum works very well for this.
- A Condenser Coil Brush: These are cheap, long-handled brushes with soft bristles designed to fit between the coil fins. A soft-bristled paintbrush or a clean, dry toothbrush can work in a pinch.
- A Soft Cloth: For wiping down surfaces.
- Mild Detergent (Optional): Only needed for stubborn grime. A drop of dish soap in water is fine.
“The bitterness of poor quality remains long after the sweetness of low price is forgotten.” – Benjamin Franklin
While Ben Franklin wasn’t talking about fridge coils, the sentiment fits. Skipping this small task can lead to the “poor quality” of a broken fridge long after you’ve forgotten the initial savings of not calling a repair person.
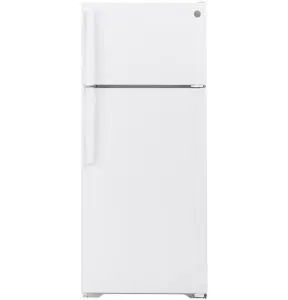
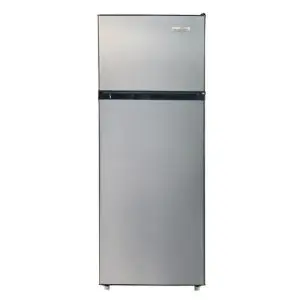
Step 2: Locating the Condenser Coils

This is where many people get stuck, as coil location varies by model. There are three common places to check:
- On the Back (Most Common): This is the classic look. The coils will be a series of thin, black tubing wrapped in a zig-zag pattern against the back panel of the fridge. They look like a radiator.
- On the Bottom (Front Access): Many modern mini fridges have a front grill at the bottom. You might see a slotted cover. The coils are hidden behind this. You may need to gently remove the cover—it often just snaps off or is held by a couple of screws.
- Behind a Panel: Some models have a metal panel covering the coils on the back. You’ll typically need a screwdriver to remove a few screws to access them.
If you’re unsure, consult your owner’s manual. A quick online search for your mini fridge’s model number (usually on a sticker inside the fridge or on the back) will often bring up a PDF of the manual. This is the best way to be certain.
Step 3: The Cleaning Process – A Gentle Approach

Now for the main event. The goal is to be thorough but gentle. You don’t want to bend the delicate fins of the coils.
- Initial Vacuuming: Using the brush attachment on your vacuum, gently go over the coils to suck up the bulk of the loose dust, lint, and pet hair. Move the brush in the direction of the coil fins to avoid bending them.
- Brushing Away Stubborn Debris: Use your coil brush (or alternative) to gently dislodge any caked-on dirt. Brush along the direction of the fins, not against them. This will loosen debris that the vacuum couldn’t get.
- Final Vacuuming: Go over the coils again with the vacuum to pick up everything you’ve loosened. The crevice tool is excellent for getting into tight corners.
- Dealing with Sticky Grime (If Necessary): If there’s greasy dirt (common in kitchens), you can use a slightly damp cloth. Important: Wring the cloth out so it’s just damp, not wet. You do not want water getting into the electrical components. Never use a spray cleaner directly onto the coils.
That’s it for the coils themselves! While you’re back there, take a moment to vacuum the area on the back of the fridge and the floor where it usually sits. This helps prevent dust from being sucked right back in.
Step 4: Reassembly and Restart

- Replace Any Covers: If you removed a front grill or a back panel, securely put it back in place.
- Move the Fridge Back: Carefully slide the fridge back to its position. Be sure to leave the recommended amount of clearance around it (especially if the coils are on the back) for proper airflow. Check your manual for this; usually, a few inches is sufficient.
- Plug It In: Once everything is back in place, plug the fridge back into the wall outlet.
- Listen and Wait: You should hear the compressor kick in and run. It might run for a little while initially to get back down to temperature, but the sound should be steady and relatively quiet, not strained. It may take a few hours for the interior to reach its optimal temperature.
How Often Should You Clean the Coils?
The frequency depends on your environment. A good rule of thumb is to check every six months. However, if your mini fridge is in a particularly dusty area (like a garage or workshop), near a carpet that sheds fibers, or you have shedding pets, you might need to clean it every three to four months. A quick visual check takes seconds and can tell you if it’s time.
“The key to success is to focus on goals, not obstacles.”
Don’t let the thought of this task become an obstacle. The goal is a cold drink and a working fridge. The cleaning process is the simple path to that goal.
Frequently Asked Questions for Clean Condenser Coils On A Mini Fridge
Can I use a hairdryer to blow the dust out?
I don’t recommend it. Using compressed air or a hairdryer on a “cool” setting can work, but it often just blows the dust into the air and all over your room, where it will eventually settle back on the coils or other surfaces. Vacuuming is a much cleaner and more effective method.
What if I accidentally bend some of the coil fins?
Don’t panic. A few slightly bent fins are not a major problem. You can carefully straighten them with a fin comb (a specialty tool), but it’s often not necessary. Just try to be more careful going forward. The main issue is a large-scale bend that blocks airflow.
My mini fridge still isn’t cooling well after I cleaned the coils. What’s wrong?
This could indicate a different issue, such as a problem with the evaporator fan (if your model has one), a faulty thermostat, or a refrigerant leak. If a good coil cleaning doesn’t solve the cooling problem, it might be time to consult a professional appliance repair technician for a diagnosis.
Is it safe to use water to clean the coils?
Generally, no. Water and electricity are a dangerous mix, and moisture can cause corrosion on the coils or other components. The damp cloth method described above is the safest way to handle sticky spots, ensuring minimal moisture is used.
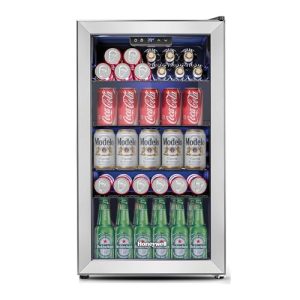
Beyond the Coils: Other Simple Maintenance Tips
To keep your mini fridge in top shape, consider these extra steps:
- Clean the Interior: Regularly wipe down shelves and walls with a mixture of baking soda and water to prevent odors.
- Check the Door Seal: Ensure the rubber gasket is clean and forms a tight seal. A weak seal lets cold air escape, making the fridge work harder.
- Defrost if Needed: If you have a manual defrost model, don’t let ice build-up exceed a quarter-inch thickness.
“An ounce of prevention is worth a pound of cure.” – Benjamin Franklin
This classic quote perfectly sums up condenser coil cleaning. A few minutes of preventive maintenance can save you from the “pound of cure”—a hefty repair bill or the cost of a replacement fridge.
Conclusion
Learning how to clean the condenser coils on your mini fridge is one of the most satisfying and empowering bits of home appliance care you can learn. It’s not a complex repair; it’s basic upkeep, like changing the air filter in your car. That groaning fridge I told you about at the beginning? It’s still running perfectly years later, all because of a simple habit I’ve built.
By following these steps, you’re not just cleaning; you’re actively extending the life of your appliance, saving money on your energy bills, and ensuring your food stays safely chilled. You’ve got this. Give your hard-working mini fridge the breath of fresh air it deserves.