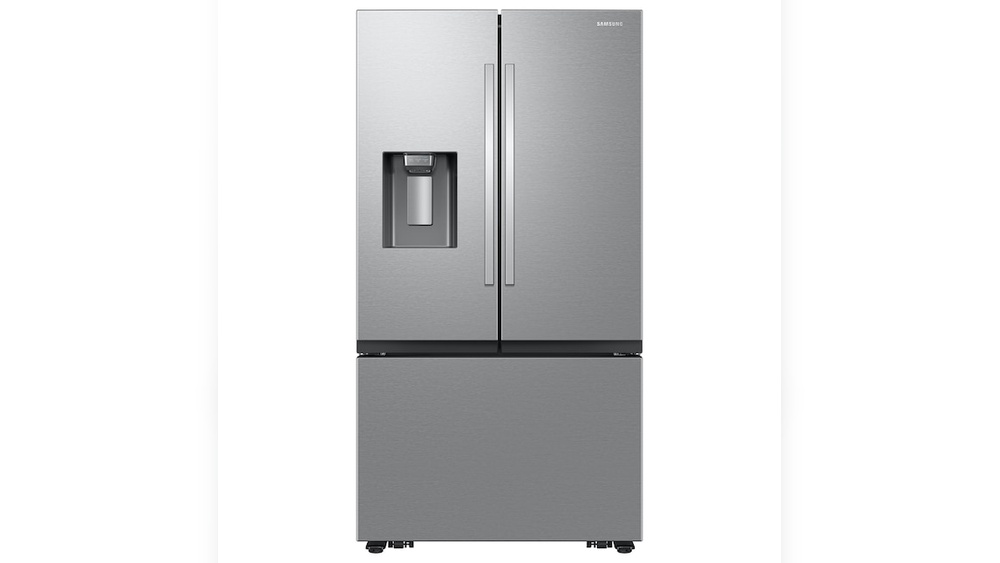
If your Samsung Smart Refrigerator’s ice maker isn’t working properly or you just need to remove it for maintenance, you might be wondering where to start. Removing the ice maker may seem tricky at first, but with the right steps, you can do it yourself safely and efficiently.
In this guide, you’ll learn exactly how to remove the ice maker from your Samsung Smart Refrigerator without stress. Keep reading, and you’ll discover simple tips that save you time and prevent damage—so you can get your fridge back in top shape quickly.

Credit: www.youtube.com
Locate Ice Maker Assembly
Start by finding the ice maker assembly inside your Samsung smart refrigerator. This step is essential before removal. The ice maker is usually fixed in a specific spot to produce and store ice.
Knowing the exact position helps you work safely and avoid damage. Take your time to identify the assembly carefully.
Open Refrigerator Door
First, open the refrigerator door fully. This gives you clear access to the interior components. Stand in front of the fridge and look inside slowly.
Make sure the door stays open during the process. Use a flashlight if the lighting is poor. This helps you see the ice maker and related parts better.
Identify Ice Maker Position
The ice maker assembly is often on the left side of the freezer compartment. It looks like a small box with a tray or bucket beneath it. You may notice some wiring connected to it.
Check for a removable ice tray or bucket nearby. This is part of the assembly. Confirm its position before trying to detach anything.
Disconnect Power Supply
Before removing the ice maker from your Samsung smart refrigerator, disconnecting the power supply is essential. This step ensures your safety and prevents any electrical damage. Always handle electrical components with care to avoid shocks or short circuits.
Start by cutting off the power source to the refrigerator. Then, carefully detach the electrical connectors linked to the ice maker. Follow each step patiently to keep the process smooth and safe.
Unplug Refrigerator
Locate the power cord at the back of the refrigerator. Firmly grip the plug and pull it out from the power outlet. Do not yank the cord to avoid damage. Confirm the refrigerator is completely off before continuing.
Remove Electrical Connectors
Open the refrigerator door to access the ice maker area. Find the electrical connectors attached to the ice maker. Gently press the release tabs and pull the connectors apart. Keep connectors safe for reassembly or replacement.
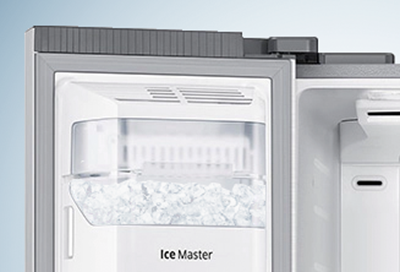
Remove Ice Bucket
Removing the ice bucket is the first step in taking out the ice maker from your Samsung smart refrigerator. This part holds the ice cubes and slides in and out easily. Handling the ice bucket carefully helps avoid damage to the fridge and the bucket itself. Follow these simple steps to remove it correctly.
Lift And Pull Ice Bucket Out
Open the freezer or ice compartment door fully. Locate the ice bucket inside the compartment. Hold the bucket firmly with both hands. Lift it slightly to unlock from its position. Pull the bucket straight out toward you. Avoid tilting it to prevent spilling ice cubes. If it feels stuck, check for any catches or locks.
Set Ice Bucket Aside Safely
Find a clean, flat surface near the fridge. Place the ice bucket down gently to avoid cracks. Keep it upright to prevent ice from spilling. Avoid putting heavy items on top of the bucket. This keeps the bucket safe while you work on removing the ice maker. It also prevents damage to the ice bucket or the floor.
Credit: www.samsung.com
Detach Ice Maker Unit
Detaching the ice maker unit from your Samsung Smart Refrigerator is a straightforward step. It involves careful handling to avoid damage. This section guides you through the process, making it easy to follow.
Focus on the ice maker’s mounting slots and connections. Removing the unit safely requires patience and gentle movements. Take your time to ensure everything comes apart smoothly.
Locate Mounting Slots
Open the freezer compartment to access the ice maker. Look for two small mounting slots near the top of the unit. These slots secure the ice maker to the fridge frame. Identifying them clearly helps in releasing the unit without force.
Release Ice Maker From Slots
Press or lift the locking tabs to unlock the ice maker. These tabs hold the unit firmly in place. Carefully release them to free the ice maker from the slots. Avoid using sharp tools to prevent damage.
Wiggle And Pull Unit Out
Once unlocked, gently wiggle the ice maker to loosen it. Small back-and-forth movements help release it from tight spots. After wiggling, pull the unit straight out towards you. Keep the motion slow and steady to avoid breaking any parts.
Handle Frozen Ice Maker
Frozen ice makers in Samsung smart refrigerators can block ice removal. Handling frozen parts carefully prevents damage. Use gentle methods to thaw ice buildup. This helps remove the ice maker safely. Below are simple ways to handle frozen ice makers.
Defrost Frozen Components
Start by unplugging the refrigerator for safety. Leave the freezer door open to warm the ice maker. Let the ice melt naturally for several hours. Avoid sharp tools that can damage parts. Check the ice maker regularly to see progress. Removing melted water helps speed up defrosting. This method is safe and protects your appliance.
Use Warm Cloth Or Hair Dryer
Apply a warm cloth to frozen areas to melt ice gently. Use a hair dryer on low heat setting for stubborn ice. Keep the dryer moving to avoid overheating parts. Do not hold it too close to avoid damage. Warmth softens ice, making it easier to remove the ice maker. Always unplug the fridge before using electrical devices inside. This technique speeds up thawing without harming your refrigerator.
Remove Ice Tray
Removing the ice tray is an important step in detaching the ice maker from your Samsung Smart Refrigerator. The ice tray holds the ice cubes and must be handled with care. This ensures the process goes smoothly without damaging any parts.
Careful removal also helps avoid spills or breaking the tray. Follow each step closely for best results.
Unlock Ice Tray Clips
Locate the clips securing the ice tray in place. These clips are usually on the sides or front of the tray. Gently press or lift the clips to unlock them. Avoid using too much force to prevent breaking the clips.
Once unlocked, the ice tray will be free to move. This step is key to safely removing the tray without damage.
Slide Ice Tray Out Carefully
After unlocking, slowly slide the ice tray out of its slot. Hold the tray firmly with both hands. Pull it straight out to avoid catching on any parts inside the refrigerator.
Take your time to prevent spilling ice or damaging the tray and surrounding components. If the tray feels stuck, check the clips again to make sure they are fully unlocked.
Inspect And Clean Ice Maker Area
Inspecting and cleaning the ice maker area is important before removing the ice maker. Dirt and ice blockages can cause problems with ice production. Taking a few minutes to check and clean this area can make the removal process easier. It also helps keep your Samsung Smart Refrigerator running smoothly.
Check For Ice Blockages
Look inside the ice maker area for any ice build-up. Ice blockages can stop the ice maker from working properly. Use a soft cloth or a plastic tool to remove ice carefully. Avoid using sharp objects that might damage the parts. Make sure the area is clear before moving to the next step.
Clean Ice Maker Housing
Wipe the ice maker housing with a damp cloth. Remove any dust, dirt, or food particles. Clean all corners and edges where dirt can hide. Dry the area with a clean cloth to prevent moisture build-up. A clean housing helps the ice maker work better and lasts longer.
Credit: www.samsung.com
Reinstall Or Replace Ice Maker
Reinstalling or replacing the ice maker in your Samsung Smart Refrigerator is a straightforward process. This step ensures your ice maker fits securely and works properly. Follow each step carefully to avoid damage and ensure smooth operation.
Align Unit With Mounting Slots
Start by positioning the ice maker near its place inside the fridge. Look for the mounting slots on the refrigerator wall. Gently slide the ice maker into these slots. Make sure it fits snugly and is level. Avoid forcing it to prevent breaking any parts.
Reconnect Electrical Plugs
Locate the electrical connectors on the ice maker and inside the fridge. Carefully plug them together until they click. The connection must be tight to supply power properly. Check the cables for any damage before reconnecting. A secure connection is key for proper function.
Test Ice Maker Function
After installation, turn on the refrigerator’s ice maker feature. Listen for any unusual sounds or vibrations. Check if the ice maker starts producing ice within a few hours. If ice forms correctly, the installation is successful. If not, double-check the connections and alignment.
Troubleshoot Common Issues
Troubleshooting common issues with your Samsung Smart Refrigerator’s ice maker helps avoid unnecessary removal. Simple checks can fix many problems fast. Follow these steps to diagnose and solve ice maker troubles before removing the unit.
Reset Ice Maker
Start by resetting the ice maker. Locate the reset button on the ice maker unit. Press and hold it for about 10 seconds. The ice maker will stop and restart its cycle. This can clear minor errors and glitches. Wait for a few minutes to see if ice production resumes.
Check Water Supply
Ensure the water supply line is connected and turned on. A blocked or frozen water line stops ice from forming. Look for kinks or leaks in the hose. Check the water filter and replace it if clogged. Proper water flow is essential for ice maker operation.
Inspect For Mechanical Problems
Examine the ice maker for visible mechanical issues. Check the ejector arm to see if it moves freely. Remove any ice jams or debris inside the ice tray. Listen for unusual noises indicating motor or gear problems. Mechanical faults may require professional repair or replacement.
Frequently Asked Questions
How Do I Remove The Icemaker From My Samsung Refrigerator?
Unplug the refrigerator and locate the ice maker on the left side. Disconnect its electrical plug. Release the two top slots, then gently pull the ice maker forward, wiggling if needed, to remove it from the housing.
How To Remove Frozen Samsung Ice Maker From Housing?
Unplug the ice maker’s power connector. Locate the two top slots, then gently pull the ice maker forward. Wiggle slightly to free it from the housing.
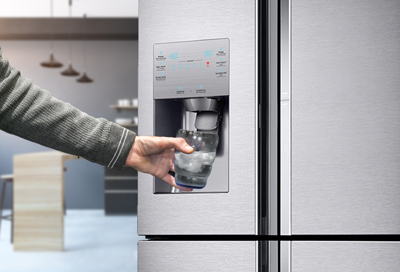
Where Does The Ice Come Out On A Samsung Smart Fridge?
Ice dispenses from the ice dispenser located on the left door of Samsung smart refrigerators. Pull the lever to release ice cubes.
How To Remove An Ice Maker?
Unplug the refrigerator and turn off the water supply. Remove the ice bucket, disconnect wiring harness, then unscrew and pull out the ice maker gently.
Conclusion
Removing the ice maker from your Samsung smart refrigerator is simple. Follow the steps carefully and take your time. Disconnect power before starting for safety. Gently unplug the wiring and unscrew the unit. Wiggle the ice maker slightly to free it.
Keep parts organized for easy reassembly. Regular maintenance helps keep your fridge working well. Now, you can remove or replace the ice maker with confidence. This guide saves time and avoids damage. Enjoy a hassle-free experience with your Samsung fridge.

Hi, I’m the lead researcher and appliance enthusiast behind RefrigeratorSolve. With years of hands-on experience troubleshooting cooling systems and testing home appliances, I am dedicated to bringing you honest reviews, energy-saving tips, and practical solutions to keep your refrigerator running perfectly.