Discover simple, step-by-step tips to clean and organize your fridge like a pro—keeping it fresh, efficient, and clutter-free in minutes!
Have you ever opened your fridge and wondered how things got so messy? A clean fridge isn’t just about appearances—it’s about keeping your food safe and fresh.
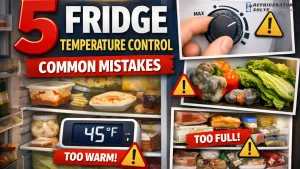
Did you know that keeping your fridge at or below 41°F can lower the risk of foodborne illnesses like listeriosis? Studies even show that delis with poor fridge management often face higher risks.
When you clean your fridge regularly, you’re not just organizing—you’re protecting your health and reducing waste. Let’s make it easier to find what you need and keep everything in great shape!
Major Learnings
- Take everything out of your fridge before cleaning. This helps you see spills and organize better.
- Look at expiration dates often and throw out bad food. This keeps your fridge smelling good and cuts down waste.
- Put similar items together so they’re easy to find. Organizing helps you grab things fast and avoid losing food.
- Clean with safe stuff like vinegar or baking soda. These natural cleaners work well without using harsh chemicals.
- Write labels and dates on your food to check freshness. This easy habit helps you use food before it goes bad, saving money and cutting waste.
Empty and Declutter Your Fridge
Cleaning your fridge starts with one simple but powerful step—emptying it completely. Trust me, this makes everything else so much easier. Let’s break it down.
Remove All Items and Sort
First, take everything out of the fridge. Yes, everything! This gives you a clear view of what you’re working with and makes cleaning a breeze. I like to place all the items on my kitchen counter or table so I can see them at a glance. While you’re at it, pull out any removable shelves and bins. These are much easier to clean when they’re outside the fridge.
Pro Tip: Removing all items also helps you avoid missing hidden spills or crumbs stuck in the corners.
Once everything is out, start sorting. Group similar items together—dairy in one spot, condiments in another, and so on. This step will save you time when it’s time to put everything back.
Check Expiration Dates and Discard Spoiled Food
Now comes the part we all dread—checking expiration dates. But it’s worth it! Did you know that 9.5–12% of household food waste in the EU happens because of expiration date issues? In the U.S., 83% of shoppers throw away food based on sell-by dates, even though those dates don’t always mean the food is bad.
Go through each item and toss anything expired or spoiled. If you’re unsure about something, it’s better to be safe than sorry. This step not only clears up space but also ensures your fridge stays fresh and safe for your family.
Group Similar Items for Easy Reorganization
Once you’ve sorted and discarded, it’s time to group similar items. Think of your fridge as a puzzle where every piece has its place. Keep dairy products like milk, cheese, and yogurt together. Store fruits and veggies in one section, and designate a shelf for leftovers or meal prep items.
Why this works: Grouping items makes it easier to find what you need and prevents things from getting lost in the back. Plus, it helps you stay organized in the long run.
When you clean your fridge this way, you’ll notice how much more functional and tidy it feels. Everything will have a home, and you’ll spend less time hunting for that jar of pickles or block of cheese.
Clean Your Fridge Thoroughly

Once your fridge is empty, it’s time to roll up your sleeves and give it a good scrub. A thorough cleaning not only makes your fridge look great but also keeps bacteria and odors at bay. Let’s dive into the steps!
Wipe Down Shelves, Drawers, and Walls
Start by removing all the shelves and drawers that can come out. Trust me, this makes cleaning so much easier. For the fridge interior, grab a soft cloth or sponge and wipe down the walls, ceiling, and any fixed shelves. I like to use warm, soapy water for this—it’s gentle but effective.
For the removable parts, soak them in a sink filled with warm water and a bit of dish soap. Let them sit for a few minutes while you tackle the rest of the fridge. Then, scrub them gently, rinse, and dry completely before putting them back.
Quick Tip: Use a solution of cool water and baking soda to wipe each shelf. It’s great for eliminating odors and safe for food storage areas.
Here’s a quick breakdown of cleaning methods:
| Area | Cleaning Method |
|---|---|
| Refrigerator | Remove all food, wipe down shelves, drawers, and walls to eliminate odors. |
| Shelves/Drawers | Mix natural dish soap with warm water, scrub, rinse, and dry thoroughly. |
Use Safe Cleaning Solutions
When it comes to cleaning your fridge, safety is key. You don’t want harsh chemicals lingering where you store your food. I always stick to natural or food-safe cleaners. A simple mix of vinegar and water works wonders for cutting through grime. Baking soda is another favorite of mine—it’s gentle, effective, and leaves no chemical residue.
Important Reminder: Sanitizing food contact surfaces is essential. Always follow the instructions on cleaning products to ensure they’re safe and effective.
If you’re using a commercial cleaner, make sure it’s labeled as safe for food storage areas. And don’t forget to rinse thoroughly with water to remove any residue.
Tackle Stains and Tough Spots
Stubborn stains? No problem! For sticky spills or dried-on messes, I recommend soaking the area with warm water for a few minutes. This softens the gunk and makes it easier to wipe away. For tougher spots, sprinkle a little baking soda directly onto the stain and scrub gently with a damp sponge.
If you’re dealing with a really tough stain, try this trick: mix a paste of baking soda and water, apply it to the spot, and let it sit for 10-15 minutes. Then, scrub and rinse. It works like magic!
Pro Tip: Regular cleaning every 1-2 months prevents stains from building up and keeps your fridge looking fresh.
By following these steps, you’ll not only clean your fridge but also extend its lifespan. A clean fridge is a happy fridge—and a happy fridge keeps your food fresher for longer!
Clean and Defrost the Freezer
Cleaning the freezer might seem like a daunting task, but trust me, it’s easier than you think. A clean freezer not only keeps your food fresh but also helps your fridge run more efficiently. Let me walk you through the steps to tackle this job like a pro.
Step 1: Empty the Freezer
Start by taking everything out of the freezer. Place frozen items in a cooler or wrap them in towels to keep them cold while you work. This step gives you a clear view of what’s inside and makes cleaning much easier.
Quick Tip: If your freezer is packed, plan this task when it’s not full. It’ll save you time and effort!
Step 2: Defrost the Freezer
If your freezer has a lot of frost buildup, it’s time to defrost it. Turn off the freezer or unplug it, and leave the door open. Place towels around the base to catch any melting ice. For faster defrosting, I like to use a bowl of hot water placed inside the freezer—it speeds up the process.
Safety Note: Never use sharp objects to chip away ice. It can damage the freezer and cause injuries.
Step 3: Clean the Interior
Once the frost is gone, it’s time to clean. Use a mixture of warm water and mild dish soap to wipe down the walls, shelves, and drawers. For stubborn stains or sticky spots, sprinkle a little baking soda and scrub gently with a sponge.
Here’s a simple cleaning solution I swear by:
Ingredients:
- 1 cup warm water
- 2 tablespoons white vinegar
- 1 teaspoon baking soda

Mix these together and use it to wipe down the freezer interior. It’s safe, effective, and leaves no chemical residue.
Step 4: Organize and Restock
Before putting everything back, check each item for freezer burn or expired dates. Toss anything that’s no longer good. Group similar items together—meats in one section, frozen veggies in another, and desserts in their own spot.
Why this matters: Organizing your freezer makes it easier to find what you need and prevents food from getting lost in the back.
By following these steps, you’ll not only clean your fridge and freezer but also keep your food fresher for longer.
Organize Your Fridge Effectively
Keeping your fridge organized isn’t just about looks—it helps food stay fresh and easy to find. When everything has a spot, you’ll save time and waste less. Let’s turn your fridge into a system that works for you!
Group Food into Sections

Putting food into sections makes a big difference. It’s not just handy—it keeps food fresher too. Here’s how you can do it:
- Top shelves: Use these for snacks, drinks, and leftovers. These foods don’t need the coldest spots, so they last longer here.
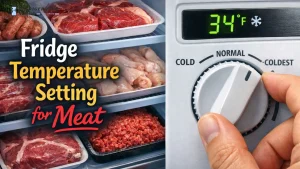
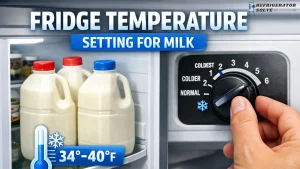
- Middle and bottom shelves: Store raw foods like meat, fish, and dairy here. These areas are colder, which helps keep them safe.
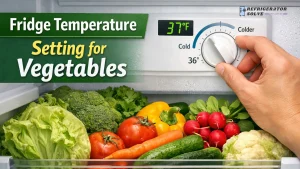
- Crisper drawers: Perfect for fruits and veggies. Many drawers let you adjust humidity, which helps produce stay fresh longer.
This setup doesn’t just look nice—it makes your fridge work better for you.
Quick Tip: Set crisper drawer humidity based on what’s inside. High humidity is great for greens, while low humidity works for fruits like apples.
Add Bins, Turntables, and Liners
Does your fridge feel like a place where food gets lost? Adding a few tools can help fix that!
- Bins: Clear bins are great for grouping items. Use one for condiments, another for snacks, and one for fruits. It’s easier to grab what you need when things are sorted.
- Turntables: These are perfect for deep shelves. Use one for sauces or dressings so you can see everything without digging.
- Liners: Fridge liners catch spills and crumbs. They’re easy to clean or replace when dirty.
Pro Tip: Label bins with expiration dates. This helps you use food before it goes bad.
These tools make cleaning easier and keep your fridge neat for longer.
Store Food to Keep It Fresh
How you store food can make it last longer. Here’s what works well:
| Storage Method | How It Helps |
|---|---|
| Refrigeration | Slows bacteria growth and keeps food fresh. |
| Modified Atmosphere Packaging (MAP) | Changes air inside packaging to delay spoilage. |
| Moisture Control | Keeps food from drying out or spoiling. |
For example, I keep leafy greens in a container with a damp paper towel. This keeps them crisp for days. Berries do better in containers that let air flow to stop mold.
Quick Tip: Don’t pack your fridge too full. Air needs to move around to keep food fresh.
When you store food the right way, you’ll have less waste and a more organized fridge. It’s a win-win!
Label and Date Food for Easy Tracking
Have you ever found a mystery container in your fridge and wondered, “What is this, and when did I put it here?” I’ve been there too! That’s why labeling and dating your food is such a game-changer. It’s a simple habit that can save you time, money, and a lot of guesswork.
Why Labeling and Dating Matters
When you label and date your food, you’re giving yourself a clear roadmap. You’ll know exactly what’s in your fridge and how long it’s been there. This helps you use food before it spoils, which means less waste and more savings.
Research shows that adding labels with dates can make a big difference. Check out these findings:
| Evidence Type | Findings |
|---|---|
| Information Intervention | Significantly reduces expected food discard by 0.028 kg. |
| Quality Guaranteed Date Label | Prolongs food usability by an average of 1.483 days, showing the highest potential for waste reduction. |
| Best Before Date Label | Prolongs food usability by an average of 1.013 days, indicating effectiveness in reducing waste. |
Fun Fact: Just adding a “Best Before” label can extend the life of your food by over a day! That’s one less trip to the grocery store.
How to Label and Date Like a Pro

Labeling doesn’t have to be complicated. Here’s how I do it:
- Use Clear Labels: I keep a roll of masking tape and a permanent marker in my kitchen drawer. Write the name of the food and the date you stored it. For example, “Chicken Soup – Oct 15.”
- Color-Coding: If you’re feeling fancy, use different colored labels for different types of food. Green for veggies, blue for leftovers, and red for meats. It makes finding things even easier.
- Pre-Printed Stickers: You can also buy pre-printed food storage labels. They’re great for marking expiration dates or “use by” dates.
Quick Tip: Label leftovers and meal prep containers as soon as you put them in the fridge. It’s easy to forget later!
Make It a Habit
The key to success is consistency. I’ve made it a habit to label everything before it goes into the fridge. It only takes a few seconds, but it saves so much time and stress later. Plus, it feels great knowing I’m wasting less food.
By labeling and dating your food, you’ll always know what’s fresh and what needs to be used up. It’s a small step that makes a big difference in keeping your fridge organized and your meals stress-free. So, grab that marker and start labeling—your future self will thank you!
Maintenance Tips for a Clean Fridge
Keeping your fridge clean doesn’t have to be a chore. With a few simple habits, you can maintain a fresh, organized fridge that works for you. Let me share some tips that have made a big difference in my kitchen.
Wipe Spills Immediately
Spills happen, but leaving them can lead to bacteria growth and unpleasant odors. I always clean up spills as soon as I spot them. It’s quick and prevents sticky messes from becoming a bigger problem later.
The CDC emphasizes the importance of cleaning spills immediately to stop bacteria from spreading. While they focus on high-risk areas, the same principle applies to your fridge. A quick wipe with warm, soapy water or a food-safe cleaner does the trick.
Pro Tip: Keep a small cloth or sponge handy in the kitchen. It makes cleaning spills a breeze!
Schedule Regular Cleanings
I’ve found that setting a cleaning schedule keeps my fridge in top shape. Every 3-4 weeks, I take 15-20 minutes to wipe down shelves, toss expired food, and reorganize. It’s a small effort that pays off big time.
Here’s why regular cleaning matters:
- It stops bacteria from growing, keeping your food safe.
- It eliminates odors that can affect the taste of your food.
- It helps your fridge run efficiently, saving energy.
For an easy routine, follow these steps:
- Clean your fridge every 3-4 weeks.
- Address spills and stains immediately.
- Check for expired or moldy food and clean the surrounding area.
Quick Tip: Add a reminder to your calendar or phone so you never forget!
Rotate Food to Use Older Items First
One of the simplest ways to reduce waste is by rotating your food. I always place newer items behind older ones. This way, I use up what’s close to expiring first.
Did you know that households waste 20-30% of the food they buy? Proper storage and rotation can extend food shelf life by 30-50%. Plus, keeping your fridge organized helps you make smarter choices when cooking or shopping.
| Statistic Description | Value |
|---|---|
| Average food waste in households | 20-30% of purchased food |
| Potential extension of food shelf life with proper storage | 30-50% |
| Impact of organization on consumer decisions | More informed purchasing and consumption decisions |
Pro Tip: Use clear bins or labels to track expiration dates. It makes rotating food even easier!
By following these tips, you’ll keep your fridge clean, organized, and efficient. Trust me, it’s worth the effort!
Keep a Checklist for Expiration Dates
Have you ever reached into your fridge only to find a forgotten yogurt or a mystery container past its prime? I’ve been there too, and it’s frustrating. That’s why I started keeping a checklist for expiration dates. It’s a simple habit that makes a big difference in reducing waste and keeping my fridge organized.

Here’s how it works. I jot down expiration dates for items that tend to get overlooked—like condiments, leftovers, and dairy products. I keep the list on my fridge door or use a small whiteboard. This way, I can glance at it while planning meals or grabbing a snack.
Quick Tip: Use a digital app or your phone’s notes feature if you prefer a paperless option.
Why does this matter? Studies show that people who check expiration dates often waste less food. It’s not just about tracking dates—it’s about feeling in control of what’s in your fridge. When you know what needs to be used up, you’re more likely to plan meals around those items.
Here’s what research says about the benefits of tracking expiration dates:
| Findings | Description |
|---|---|
| Positive Attitudes | People who care about reducing food waste tend to waste less. |
| Frequency of Checking | Regularly checking expiration dates lowers the chance of throwing food away. |
| Perceived Behavioral Control | Feeling in control leads to better food management and less spoilage. |
I’ve noticed that keeping a checklist also helps me save money. When I use food before it spoils, I’m not constantly replacing items. Plus, it feels good knowing I’m wasting less.
If you’re new to this, start small. Write down expiration dates for just a few items, like leftovers or dairy. Once you get the hang of it, expand to other categories. Trust me, it’s worth the effort. You’ll have a cleaner fridge, less waste, and fewer surprises lurking in the back!
Cleaning and organizing your fridge doesn’t have to be complicated. It’s a simple process that can make a big difference in your daily life. When your fridge is tidy, you’ll save time hunting for ingredients, waste less food, and keep your meals fresher.
Here’s what I’ve noticed:
- Households throw away 20-30% of the food they buy.
- Proper storage can extend food shelf life by up to 50%.
- An organized fridge helps you make smarter choices when shopping or cooking.
Quick Tip: Start small. Pick one shelf or drawer to clean today, and build from there.
I’d love to hear your fridge-cleaning hacks! Share your tips in the comments below. Let’s keep our fridges fresh and efficient together.
FAQs For How To Clean and Organize Your Fridge?
How often should I clean my fridge?
I clean mine every 3-4 weeks. It keeps bacteria away and stops odors from building up. If you spill something, wipe it up right away. Regular cleaning makes the job easier and keeps your fridge fresh.
Tip: Add a reminder to your calendar so you don’t forget!
Can I use vinegar to clean my fridge?
Absolutely! Vinegar works wonders. Mix equal parts vinegar and water for a natural cleaning solution. It cuts through grime and eliminates odors. Plus, it’s safe for food storage areas.
Quick Tip: Rinse with water after using vinegar to remove any lingering smell.
What’s the best way to organize condiments?
I use clear bins or a lazy Susan. Group similar items together—like sauces, dressings, and spreads. It makes finding things so much easier. No more digging through the back of the fridge!
Pro Tip: Label bins with expiration dates for quick tracking.
How do I keep fruits and veggies fresh longer?
Humidity control is key. Use the crisper drawers and adjust the settings. High humidity works for leafy greens, while low humidity is better for fruits. I also use a damp paper towel to keep greens crisp.
Fun Fact: Airflow helps berries stay mold-free.
Is it okay to store hot food in the fridge?
I let hot food cool to room temperature first. Putting it in the fridge while it’s hot can raise the internal temperature, which isn’t safe for other foods. Cooling it down first keeps everything fresh and safe.
Reminder: Don’t leave food out for more than two hours!
Conclusion
A clean and organized refrigerator is the foundation of a healthy, efficient kitchen. By following these detailed steps, you’ll not only extend the life of your groceries but also reduce waste and make everyday cooking more enjoyable. Make it a routine, and your fridge will always be a source of freshness, not frustration.