I’ll admit it: The last time I opened my double door fridge, a lemon rolled out, and my guilt levels skyrocketed. Cleaning a fridge always felt intimidating — as if I’d uncover ancient civilizations of leftovers.
But after a particularly embarrassing visit from my neighbor (who caught a whiff when I reached for ice cream), I set off on my own cleaning odyssey. Here’s everything I learned, from rookie blunders to tiny victories, on how to clean a double door refrigerator. (Spoiler: It involves more baking soda than I thought possible.)
1. Facing the Food Mountain: The Unofficial Pre-clean Ritual
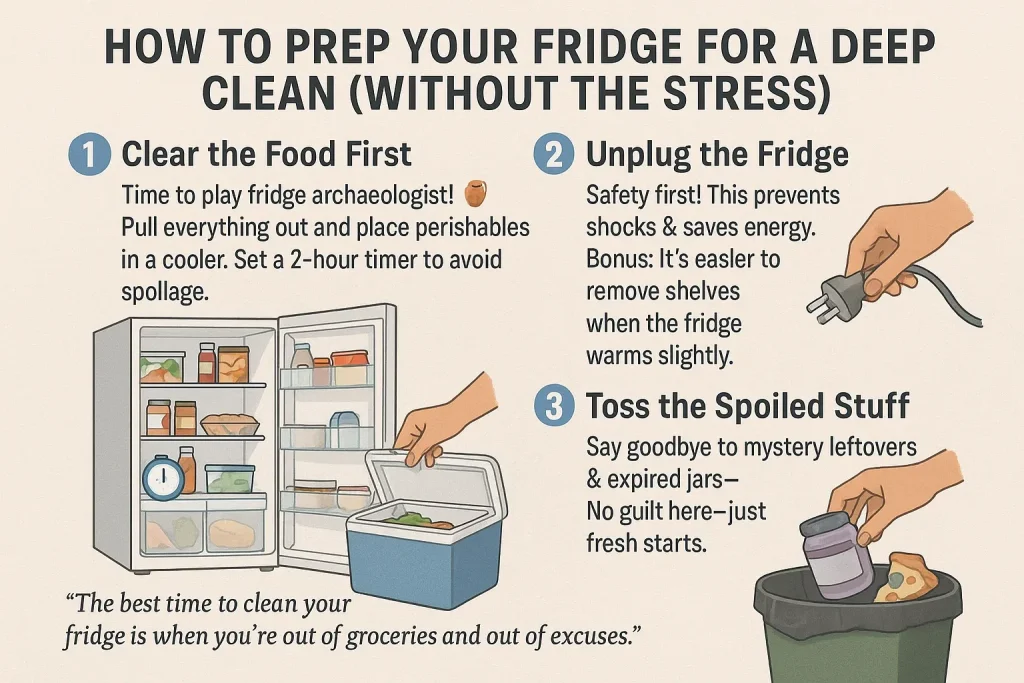
Before any scrubbing or wiping begins, there’s the first and most daunting step: remove food from refrigerator. I always feel like an archaeologist, unearthing ancient leftovers and mysterious jars from the back corners. This is the moment to channel curiosity, not guilt—yes, even when I find that container of takeout rice from last month.
As I empty out the fridge, I set up a staging area on the kitchen counter. If you have a cooler or ice chest, now’s the time to use it for any perishables you want to keep safe during the cleaning process. Remember, food should not stay out longer than two hours to avoid spoilage, so I always set a timer to keep myself on track.
Unplug the Refrigerator: Safety First
Once the fridge is empty, I unplug the refrigerator. It’s tempting to Google “fridge unplug safety” for the tenth time, but trust me, this step is important. Unplugging prevents electrical accidents and helps save energy while you clean. It also allows the fridge to warm up slightly, making it easier to remove shelves and drawers for separate cleaning.
Throw Away Spoiled Food (No Judgments Here)
Now comes the tough love part: throw away spoiled food. Anything with visible mold, odd smells, or expired dates goes straight into the trash. I try not to judge myself for the science experiments I find—after all, as Marie Kondo says:
‘The best time to clean your fridge is when you’re out of groceries and out of excuses.’ – Marie Kondo
This guilt-ridden food removal can take longer than the actual cleaning, but it’s a crucial step for refrigerator cleaning safety. Here’s a quick reference to keep in mind:
| Task | Why It Matters |
|---|---|
| Remove food from refrigerator | Allows thorough cleaning and prevents contamination |
| Unplug the refrigerator | Recommended for electrical safety and energy savings |
| Throw away spoiled food | Prevents mold and bacteria from spreading |
| Keep food out < 2 hours | Reduces risk of spoilage and foodborne illness |
With the fridge empty, unplugged, and free of questionable leftovers, I’m finally ready to tackle the next stage of cleaning.
“A clean fridge is the heart of a healthy kitchen.” – Julia Child
2. Shelves, Bins, and the Drama of the Sticky Spill: Getting Hands-On
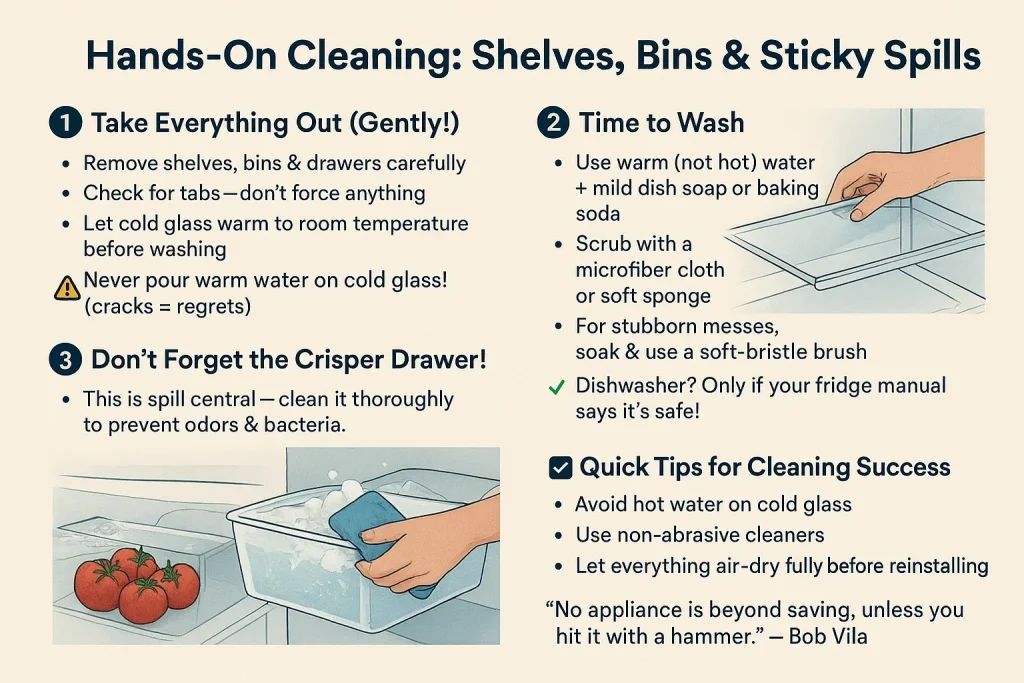
Let’s be honest: nothing tests your patience quite like a sticky spill lurking beneath a crisper drawer. The first step in my refrigerator cleaning ritual is to remove shelves and drawers—and yes, sometimes this requires gentle wiggling and a bit of colorful language. It’s worth it, though, because taking everything out gives you the best access to every nook and cranny.
Remove Shelves, Drawers, and Bins (Gently!)
- Carefully slide out shelves, bins, and crisper drawers. If they’re stuck, don’t force it—check for locking tabs or obstacles.
- Set glass shelves aside and let them come to room temperature before washing. Never use hot or warm water on cold glass—this can cause cracks and “shattered regrets.”
Wash Refrigerator Shelves and Bins
- Fill your sink with warm water (not hot) and add a few drops of mild detergent or a couple of tablespoons of baking soda. For a natural option, mix in some white vinegar.
- Wash shelves, bins, and drawers by hand using a microfiber cloth or non-scratch scrub sponge. These refrigerator cleaning tools help avoid scratches.
- For stubborn, dried-on spills, use a soft-bristled brush or let the item soak for a few minutes before scrubbing.
- If your glass shelves are dishwasher-safe, you can use the dishwasher—but always check your fridge manual first.
Don’t Forget the Crisper Drawer
The crisper drawer is often the dirtiest and most overlooked spot. Remove it completely and wash it thoroughly. This not only gets rid of hidden spills but also helps maintain food hygiene.
‘No appliance is beyond saving, unless you hit it with a hammer.’ – Bob Vila
Quick Tips for Success
- Avoid warm water on cold glass shelves to prevent breakage.
- Use a non-abrasive cleaner and microfiber cloth for a streak-free finish.
- Let everything dry completely before returning to the fridge.
With the right refrigerator cleaning products and a little patience, even the stickiest spills are no match for your hands-on approach.
“Good food starts with a clean fridge.” – Gordon Ramsay
3. The Hidden Science Behind “That Smell”: Deep Cleaning the Interior (and Why It’s Weirdly Satisfying)
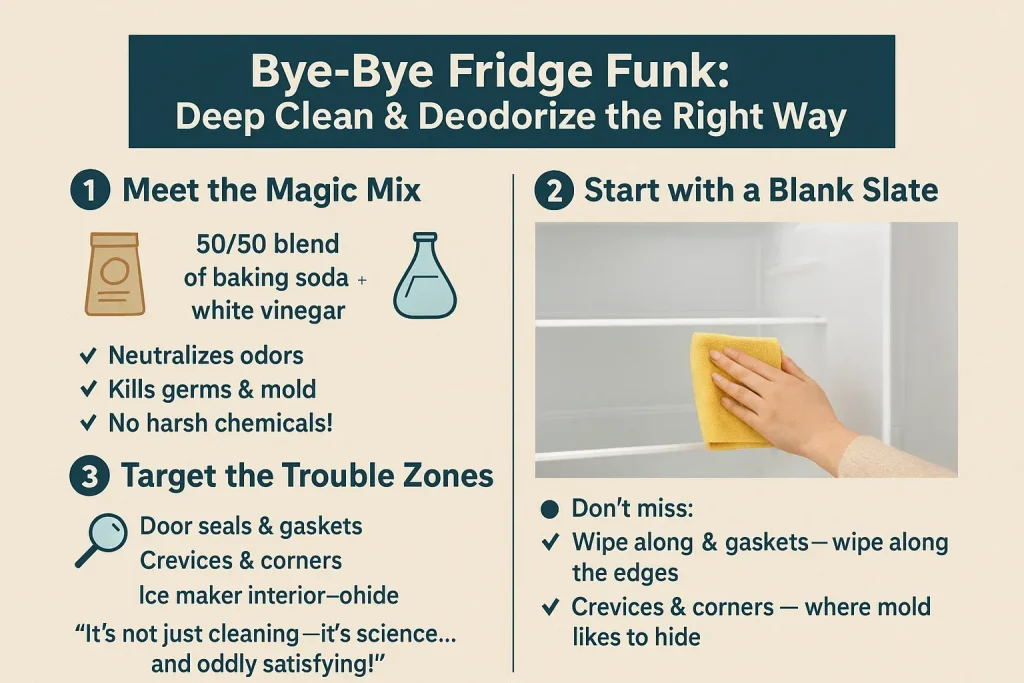
If you’ve ever opened your double door refrigerator and been greeted by a mysterious odor, you’re not alone. There’s real science behind “that smell”—and a surprisingly satisfying process to banish it for good. When I deep clean my refrigerator, I always start by removing shelves and bins, then hand wash interior surfaces with my secret weapon: a 50/50 mix of baking soda and white vinegar. This natural combo doesn’t just deodorize; it actually kills germs and mold without leaving behind harsh chemical smells.
Here’s why it works: Baking soda neutralizes acids and absorbs odors, while white vinegar is a natural antibacterial agent. Together, they tackle sticky spills, invisible bacteria, and even mildew hiding in corners. I use a soft sponge or microfiber cloth to clean refrigerator interior surfaces—no abrasive scrubbers that could scratch the finish. Warm water helps dissolve grime, and the fizzing action of baking soda and vinegar makes the process feel a bit like a science experiment (and yes, it’s weirdly satisfying to watch).
- Don’t forget seals, gaskets, and crevices. These spots love to hide sticky secrets and can harbor mold. I run a damp cloth dipped in my cleaning solution along the edges and inside the door gaskets for a thorough clean.
- Clean the ice maker interior if your fridge has one. Ice can absorb odors and bacteria, so a quick wipe-down here makes a difference.
After scrubbing, it’s crucial to dry refrigerator interior surfaces completely. I use a fresh microfiber cloth for streak-free drying. Any leftover moisture can invite mold and mildew—definitely not the kind of houseguests you want. This step is especially important for the seals and gaskets, which need to stay dry to maintain a tight, energy-saving seal.
Experts recommend a deep clean refrigerator session at least once every season. Not only does this keep your fridge fresh and organized, but it also extends its lifespan and keeps your food safer. As Samin Nosrat put it:
“You might not change the world by cleaning your fridge, but you’ll definitely change lunch.”
Making this a seasonal ritual means less mystery smells and more peace of mind every time you open those double doors.
4. The Grand Finale: Reassembly, Organization, and the Dream Fridge
After all the scrubbing, soaking, and silent cursing, it’s finally time for the most rewarding part of refrigerator organization and cleaning: putting everything back together. I always take a moment to celebrate (quietly, with a cup of coffee) before I start reassembling the shelves and bins. Make sure each piece is dry and fits snugly into its original spot—this is your chance to make your double door refrigerator feel brand new.
Thoughtful Restocking: Science Meets Real Life
When it comes to restocking, I follow a simple science-backed rule: old items in front, new items in back. This helps reduce food waste and keeps everything visible. I group similar items together—dairy on one shelf, condiments in the door, fruits and veggies in their bins. These refrigerator organization tips not only make things easier to find, but they also extend the life of your groceries and keep things tidy.
Plug In and Bask in the ‘Adulting’ Achievement
Once everything is in place, I plug the fridge back in and listen for that satisfying hum. This is the perfect time to guilt-trip everyone in the house to keep it clean. After all, refrigerator organization and cleaning is a team effort! I like to remind my family that a tidy fridge saves time, money, and stress—echoing Christina Scalise’s words:
“Organization isn’t about perfection. It’s about efficiency, reducing stress and clutter, saving time and money, and improving your overall quality of life.”
Bonus Points: Change Water Filter & Shine the Exterior
One step that’s easy to overlook is to change the water filter. Most manufacturers recommend replacing it every six months for the freshest water and ice. If your fridge has a built-in ice maker, take a moment to wipe down its interior, too. These small maintenance steps are essential for optimal freshness and taste.
Finally, I give the handles and exterior a good wipe-down. This last touch adds to that ‘clean fridge glow’ and makes the whole kitchen feel fresher. For best results, I aim for a full refrigerator cleaning frequency of once every season—spring, summer, fall, and winter. Trust me, your future self will thank you!
Lessons in Patience, Science, and the Occasional Lemon
Cleaning a double door refrigerator is never just about wiping away crumbs or tossing out expired yogurt. As I’ve learned through my own messy science experiments, it’s a blend of patience, a bit of scientific know-how, and the willingness to embrace the occasional surprise—like a forgotten lemon rolling out from the back.
This journey through my refrigerator cleaning guide has shown me that deep cleaning and regular refrigerator maintenance are not just chores, but essential habits that keep my fridge running efficiently and my food safe.
There’s something oddly satisfying about seeing those sparkling shelves and organized drawers after a deep clean refrigerator session. It’s practical, yes, but also a little bit experimental—testing which natural cleaners work best, figuring out how to reassemble shelves, and learning which foods should never be stored together.
Every fridge tells a story, and if yours is anything like mine, it’s a story of late-night snacks, meal prep ambitions, and the occasional science experiment gone wrong.
Nobody’s perfect, and as Julia Child once said,
‘If your fridge is never messy, you probably don’t cook enough.’
I remind myself of this whenever I discover a sticky spill or a mystery container. The important thing is not to let the mess pile up. A little effort goes a long way, and you don’t need to wait for a neighbor’s surprise visit to get started on your next deep clean. Regular refrigerator maintenance—whether it’s a quick wipe-down or a seasonal refrigerator cleaning—helps prevent bigger problems and makes each cleaning session less daunting.
So, the next time a lemon rolls out from the back of your fridge, don’t panic. Feel a little pride instead. You’re taking steps to make your fridge a cleaner, safer, and more efficient space. And with each cleaning, you’re not just maintaining an appliance—you’re caring for the heart of your kitchen. After all, every fridge will get messy, but with a bit of patience and science, you can always make it shine again.
Frequently Asked Questions (FAQs) for How To Clean A Double Door Refrigerator-Easy Step-by-Step Guide
How often should I clean my double door fridge?
A deep clean every 3-6 months is ideal, but wipe spills and check for expired food weekly.
Can I use bleach to clean my refrigerator?
It’s not recommended—bleach can leave strong fumes and damage surfaces. Stick to natural cleaners like vinegar or baking soda.
Why does my fridge still smell after cleaning?
Check hidden spots like drip trays or old food stuck in crevices. A baking soda box helps neutralize lingering odors.
How do I prevent frost buildup in my freezer?
Keep the door seal tight and avoid leaving the door open for long. Defrost if ice exceeds ¼ inch.
“Cleanliness is next to freshness—especially in your fridge.” – Martha Stewart
Conclusion
Cleaning a double door refrigerator doesn’t have to be overwhelming. With these easy steps, you can keep your fridge fresh, efficient, and odor-free. Regular maintenance ensures your appliance runs smoothly and your food stays safe.
Now that you know how to clean a double door refrigerator, grab your supplies and give your fridge the refresh it deserves!