To change the light bulb in a triple door refrigerator, you first need to safely disconnect the appliance’s power supply, then carefully access the bulb housing by removing its protective cover, which is usually held in place by clips or screws. The actual bulb replacement is a simple twist-and-pull operation, but the process requires patience to handle the delicate components and ensure everything is reassembled correctly to maintain the unit’s cooling efficiency.
I’ll be honest with you the first time the light went out in my triple-door fridge, I stood there, door open, feeling a cold dread that had nothing to do with the air rushing out. That inky blackness in the fresh food compartment was more than an inconvenience; it was a puzzle. I’d changed a million light bulbs in my life, but this sleek, modern appliance looked nothing like a simple lamp socket. A quick online search for a solution left me more confused, with advice ranging from “just pop the cover off” to “you might need to call a professional technician.”
After a deep breath and a methodical approach, I figured it out. Now, I want to share that knowledge with you. This isn’t just about illumination; it’s about food safety, energy efficiency, and getting the most out of your major appliance. Let’s walk through this simple project together. You can absolutely do this yourself, saving time and money on a service call.
Understanding Your Fridge’s Lighting System
How to Change the Light Bulb in a Triple Door Refrigerator
Before we grab any tools, it’s important to know what we’re dealing with. Modern triple-door refrigerators are marvels of engineering, designed for optimal food preservation and energy savings. The lighting system is a small but vital part of that.
Most models manufactured in the last decade have moved away from the old, hot-incandescent bulbs. You’re almost certainly dealing with one of two types:
- LED Modules: This is the most common lighting in newer units. An LED light is a long-lasting, energy-efficient light-emitting diode that is often integrated into a small circuit board or strip. These are fantastic because they use very little electricity and can last for years. However, when they do fail, you usually have to replace the entire module, not just a single “bulb.”

2. Specialized Bulbs: Some models still use a removable bulb, but it’s rarely a standard household type. It might be a smaller appliance bulb or a specific halogen bulb. The key here is to get the correct replacement part for your exact model.

“The bitterness of poor quality remains long after the sweetness of low price is forgotten.” – Benjamin Franklin
This quote rings true for replacement parts. Using the wrong bulb or a cheap, non-OEM (Original Equipment Manufacturer) part can lead to issues. It might not fit correctly, potentially leaving a gap that allows moisture in, or it could generate too much heat, affecting your fridge’s internal temperature.
Your Step-by-Step Guide to Changing the Bulb
Safety is the absolute number one priority here. We are dealing with electricity and a expensive appliance that keeps your food safe. Rushing this process is a recipe for trouble.
Step 1: Gather Your Supplies

You won’t need much. Here’s your list:
- Replacement Bulb or LED Module: This is the most crucial item. The best way to find the right part is to look up your refrigerator’s model number. You can usually find this on a sticker inside the fresh food compartment (on a side wall or the ceiling) or sometimes on the door frame. A quick search online with that model number and “light bulb” will point you to the exact part you need.
- A Small Socket Set or Screwdriver: Often, the lens cover is held on by small screws.
- A Soft Cloth or Small Container: To hold any tiny screws so you don’t lose them.
- A Flashlight: So you can see what you’re doing once the power is off!
- Work Gloves (Optional): To protect your hands from any sharp edges on the housing.
Step 2: Power Down the Refrigerator

This is the non-negotiable step. Do not skip this. Simply turning the fridge off at the temperature control panel is not enough. You need to completely disconnect it from its power source.
- Locate the refrigerator’s power cord and unplug it from the wall outlet.
- If the outlet is behind the fridge and you cannot access it easily, go to your home’s circuit breaker panel and switch off the circuit that powers the refrigerator. Use your flashlight to confirm the interior light does not turn on when you open the door.
Step 3: Locate and Access the Bulb Housing

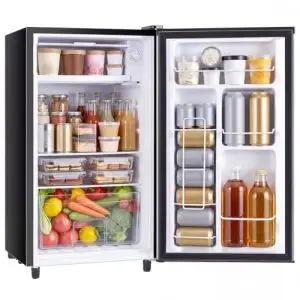
Now for the detective work. Open the fresh food door and look up at the ceiling of the compartment. You should see a plastic cover this is the lens that diffuses the light.
- This cover is typically held in place by one or two small screws or sometimes by plastic clips.
- If it’s screwed in, use your appropriate screwdriver to carefully remove the screws. Place them in your container.
- If it’s clipped in, you should be able to gently pry one end loose with your fingers. Be patient and gentle; plastic can become brittle in the cold. Avoid using a metal tool that could scratch the interior or crack the plastic.
Step 4: Remove the Old Bulb or Module
With the cover off, you’ll see the bulb or LED assembly.
- For a screw-in bulb: Gently turn it counterclockwise, just like any other bulb. It should come out easily.
- For a push-in bulb: These are less common but might be held by a base. Gently pull it straight out.
- For an LED module: These are usually plugged into a connector. Note how it’s oriented, then gently pull the connector apart. The module itself might be snapped into place or held with screws.
Step 5: Install the New Bulb or Module

Take your new, correct replacement part.
- For a bulb: Screw it in clockwise or push it into the socket until it’s snug. Do not overtighten.
- For an LED module: Connect the wiring connector first, ensuring it’s fully seated. Then, snap or screw the module into its housing.
- Before you put the cover back on, it’s a good idea to do a quick test.
Step 6: Test Before Final Reassembly
Plug the refrigerator back in or turn the circuit breaker on. Open the door. Does the new light turn on? Fantastic! If it doesn’t, don’t panic. Unplug the fridge again and double-check that the bulb is seated properly or that the LED connector is fully engaged.
Step 7: Reattach the Lens Cover
Once you’ve confirmed the new light works, disconnect the power again (safety first!). Carefully snap or screw the plastic lens cover back into its original position. Make sure it’s secure and even.
Step 8: Restore Power and Clean Up
Plug the refrigerator back in. The internal temperature might have risen slightly, so you’ll hear the compressor kick in to get back to its set point. Take a moment to wipe down the interior shelves and door bins, as you’ve had the door open for a little while. That’s it! You’ve successfully completed a basic appliance repair.
When to Call a Professional Technician
While this is a generally straightforward task, there are a few situations where picking up the phone is the smarter move:
- If the Bulb Isn’t the Problem: You’ve replaced the bulb, but it still doesn’t work. The issue could be a faulty door switch (a small button that gets pressed when the door closes, telling the light to turn off), a wiring problem, or a deeper electrical issue. A certified technician can diagnose this properly.
- If You Can’t Find the Model Number: Without the right part, you’re just guessing. A pro will have resources to identify your fridge and get the correct part.
- If You Feel Uncomfortable: Any time you are unsure about working with electricity or handling your appliance, there is no shame in calling for help. Your safety and the proper function of your fridge are what matter most.
“The only real mistake is the one from which we learn nothing.” – Henry Ford
Trying and needing to call for help isn’t a failure; it’s a learning experience. Knowing your limits is a form of expertise.
Frequently Asked Questions
How often should the light bulb in my refrigerator need replacing?
With modern LED lights, you might never need to replace it within the lifetime of the refrigerator. Older bulbs could last a year or two. If a new LED fails quickly, it could indicate a different electrical problem.
Can I use any standard appliance bulb I buy at the hardware store?
It is highly recommended to use the bulb specified for your model. The wrong wattage can generate excess heat, disrupting the carefully balanced temperature control inside your fridge and potentially creating a fire risk.
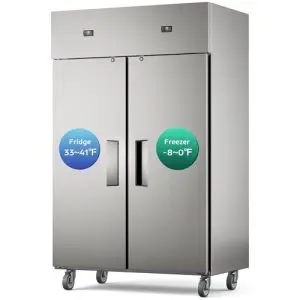
The light in my freezer compartment is out too. Is the process the same?
The process is very similar, but accessing the bulb in the freezer can be trickier due to the tighter space and often a different style of cover. Always confirm the power is off, and consult your owner’s manual for specific access instructions for the freezer section.
My fridge has a water dispenser and ice maker. Does changing the bulb affect those?
No, the lighting circuit is separate. As long as you disconnect the main power correctly, you will not affect the water or ice functions.
Where is the best place to buy a replacement bulb?
You can order directly from the manufacturer, from appliance parts websites, or even find compatible parts at large home improvement stores. Always have your model number ready.
Conclusion
Changing the light bulb in your triple-door refrigerator might seem like a small thing, but it’s a perfect example of a simple home maintenance task that boosts your daily quality of life. That fresh food compartment light is important for quickly finding what you need, reducing energy waste from having the door open too long, and just making your kitchen feel fully functional.
“Knowledge is of no value unless you put it into practice.” – Anton Chekhov
I hope this guide has given you the knowledge and confidence to tackle this project yourself. Remember the key steps: safety first by disconnecting power, find the right part using your model number, and work carefully to avoid damaging any plastic components. You’ve got this. And the next time you open your fridge door to a bright, welcoming light, you can feel that little spark of pride that comes from taking care of your home.

Hi, I’m the lead researcher and appliance enthusiast behind RefrigeratorSolve. With years of hands-on experience troubleshooting cooling systems and testing home appliances, I am dedicated to bringing you honest reviews, energy-saving tips, and practical solutions to keep your refrigerator running perfectly.