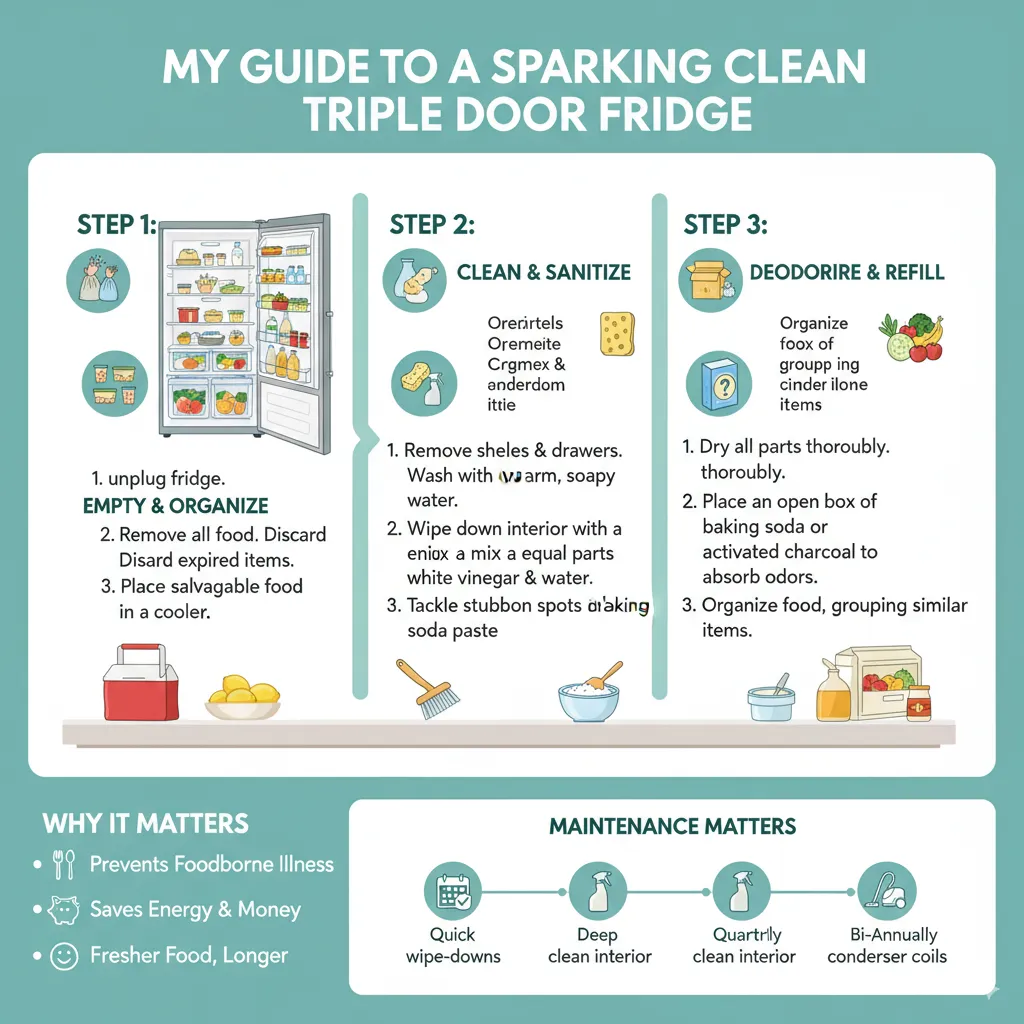
Properly cleaning a triple door refrigerator is about maintaining food safety and appliance efficiency. I do it by scheduling a deep clean every three months, focusing on one section at a time.
My Guide to a Sparkling Clean Triple Door Fridge
I remember the day my new triple door refrigerator was delivered. It was gleaming, spacious, and felt like the ultimate upgrade for my kitchen. But after a few months of heavy use, I noticed a lingering smell and some mysterious sticky spots on the glass shelves. I knew it was time to figure out a cleaning routine, but the task felt huge. Where do you even start with three separate compartments?
After a lot of trial and error, and conversations with appliance repair friends, I developed a simple, effective system. Now, keeping my fridge clean is a breeze, and it runs better than ever. I want to share that process with you. This isn’t about a complicated, day-long project. It’s about a straightforward approach that keeps your food fresh and your appliance working efficiently for years.
As a home cook who relies on this appliance daily, I can tell you that a clean fridge makes a big difference. It’s about more than just looks; it’s about preventing foodborne illness and saving money on your energy bills. Let’s walk through this together.
Why a Clean Fridge Matters More Than You Think
You might think wiping down a spill is enough, but a deep clean addresses things you can’t always see. Over time, spills drip into drawers, crumbs accumulate in crevices, and bacteria can grow on surfaces. This leads to those funky odors that can transfer to your fresh food.
A clean refrigerator also runs more efficiently. When the condenser coils are covered in dust, the motor has to work harder to keep everything cool, which uses more electricity and can shorten the life of your appliance. A simple clean can help you save money and avoid an early replacement.
Getting Ready: Your Cleaning Supply Checklist
You don’t need fancy products. Most of what you need is probably already at home:
- Basic Cleaning Solution: A mix of warm water and baking soda (about 1-2 tablespoons per quart of water) is my go-to. It’s a gentle, effective cleaner that deodorizes as it cleans. White vinegar diluted with water also works well for disinfecting.
- Microfiber Cloths: These are fantastic for cleaning and drying without leaving lint behind.
- Soft-Bristled Brush: An old toothbrush is perfect for getting into tight spots and cleaning the grooves on door seals.
- A Sponge or Soft Scrubber: For tougher, stuck-on messes.
- A Towel or large bin: For holding your food while you clean.
- A Bowl of Hot Water: For placing removable parts in to soak.
My Step-by-Step Process for a Deep Clean
Step 1: The Great Food Removal
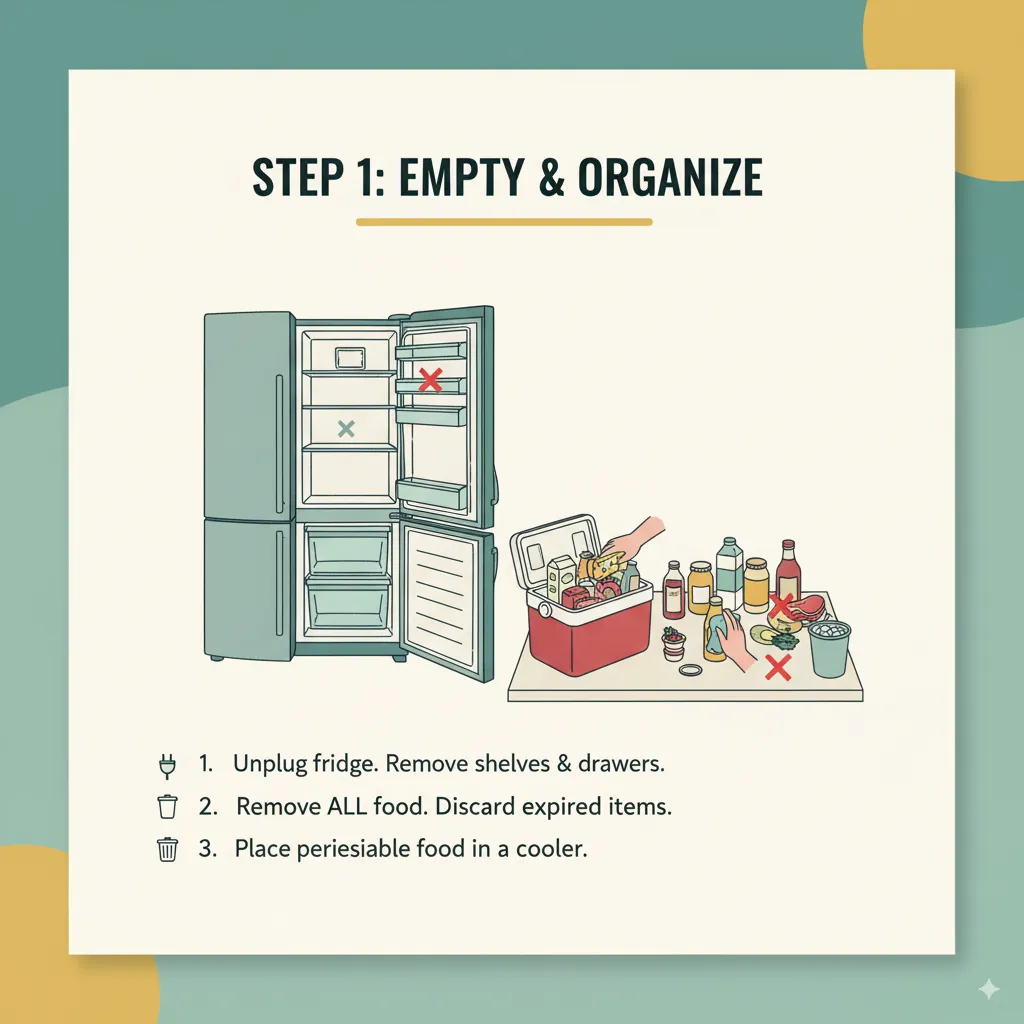
First, I take everything out. I mean everything! I place perishable items like dairy and meat into a cooler with ice packs to keep them cold and safe. I group other items on the counter. This is the perfect time to check expiration dates and toss anything that’s past its prime. I wipe down any jars or bottles that are sticky before putting them back later.
Step 2: Tackle the Removable Parts

Now, I remove all the adjustable glass shelves, crisper drawers, deli drawer, and any other removable bins. I take them to the sink and wash them with warm, soapy water. For stubborn, sticky residue, I let them soak in the hot soapy water for 10-15 minutes. I use my soft-bristled brush to scrub the edges and corners before rinsing and drying them thoroughly with a clean towel.
“A clean appliance is a happy appliance. Regular maintenance is the key to longevity and performance.” — Michael Reynolds, Appliance Repair Specialist
Step 3: Clean the Interior Surfaces
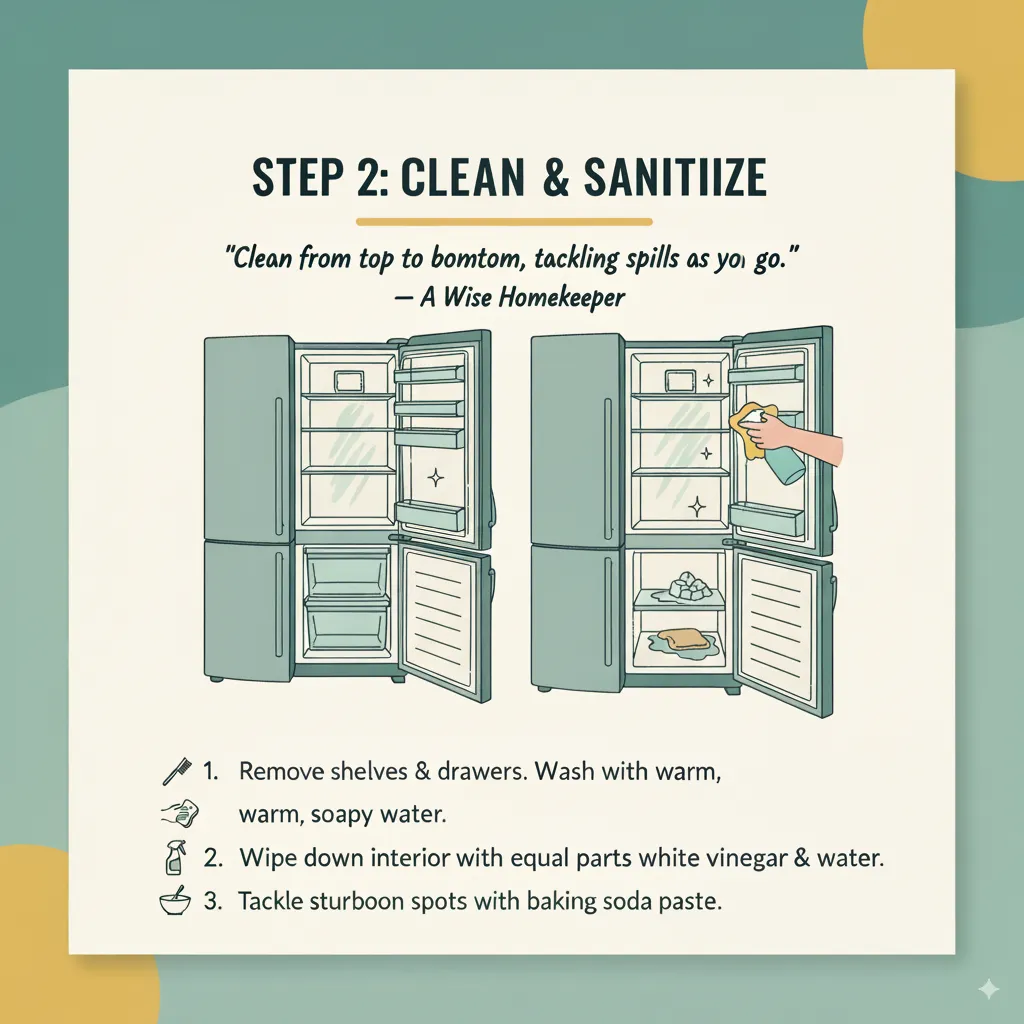
With the shelves out, I can really see the interior. Starting from the top of each compartment and working down, I wipe all the interior walls and the ceiling with my baking soda solution. I pay special attention to any visible spills or stains. For the freezer section, if there’s a thick layer of ice build-up, I never chip at it with a sharp object. Instead, I turn the fridge off and let the ice melt naturally, placing towels inside to soak up the water.
Step 4: Don’t Forget the Seals and Exterior
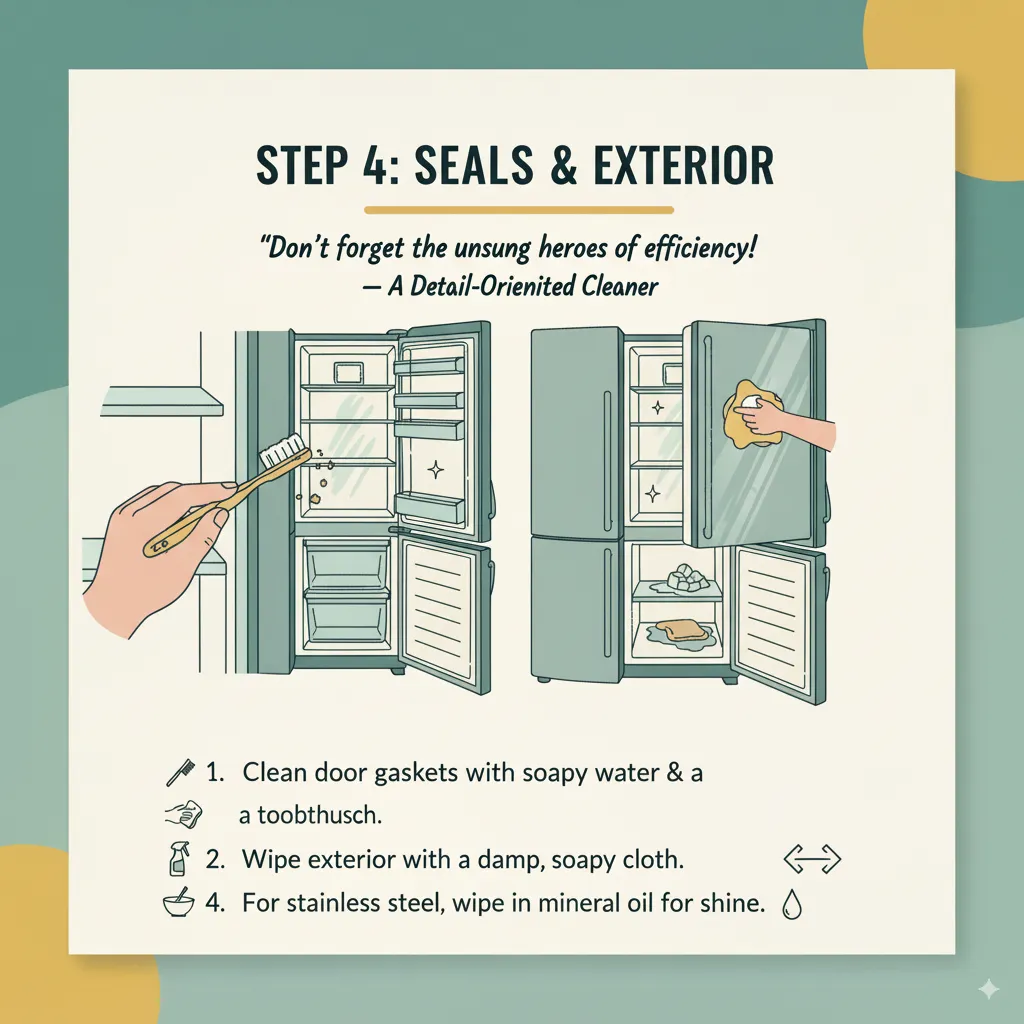
The door gaskets (the rubber seals) are crucial for energy efficiency. I dip a cloth in my cleaning solution and carefully wipe them down, using the toothbrush to dislodge any crumbs hidden in the folds. Then, I move to the exterior. I use a damp cloth with a bit of mild dish soap to clean the stainless steel doors, wiping in the direction of the grain to avoid streaks. For fingerprint-prone stainless steel, a quick wipe with a little mineral oil on a microfiber cloth keeps it looking shiny.
Step 5: The Behind-the-Scenes Hero – The Condenser Coils
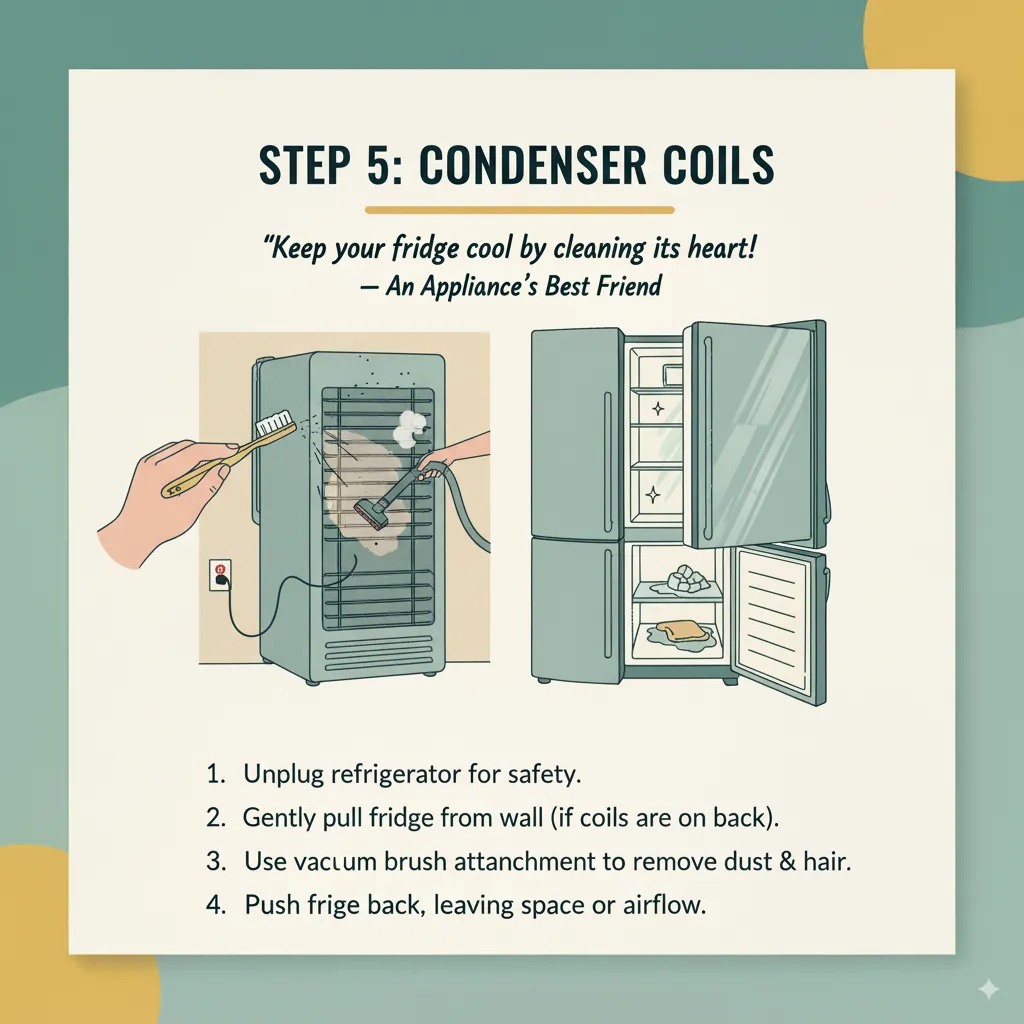
This part is often forgotten but so important. Dusty coils make your fridge work overtime. My fridge has coils on the back, so I gently pull it away from the wall (being careful not to scratch the floor). I use my vacuum’s brush attachment to gently remove all the dust and pet hair from the coils. If your coils are on the bottom behind a grill, you can usually vacuum them without moving the fridge. Always unplug the refrigerator before you clean the coils for safety.
Step 6: The Final Touches – Putting It All Back
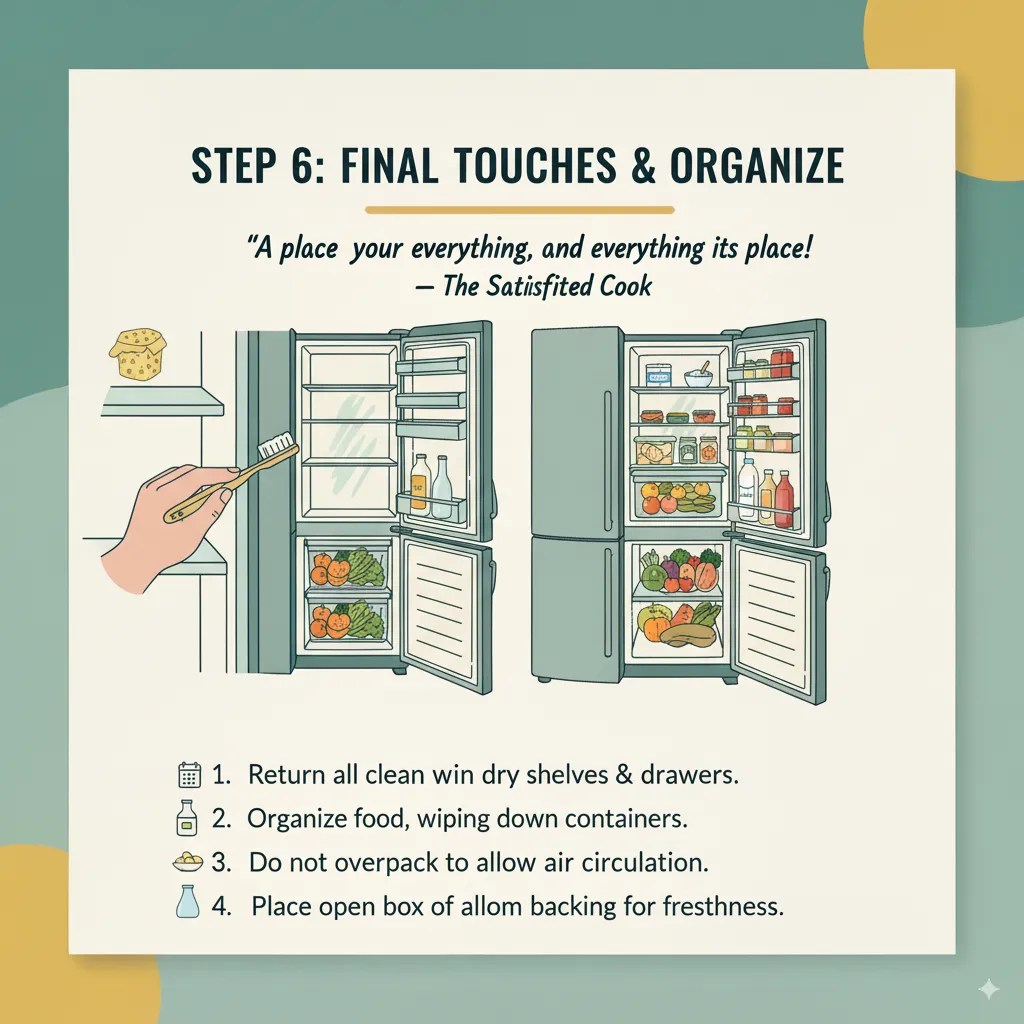
Once every surface is clean and dry, I place the clean, dry shelves and drawers back into their slots. I then organize the food back into the fridge, wiping down any containers one last time. I make sure not to overpack the shelves, as good air circulation is needed for consistent cooling.
To keep things smelling fresh, I’ll often place an open box of baking soda on a shelf. Some people use a small bowl of coffee grounds or activated charcoal.
Frequently Asked Questions for How to Clean a Triple Door Refrigerator?
How often should I clean my triple door refrigerator?
I recommend a quick wipe-down of spills as they happen and a full deep clean every 3 to 4 months. If you have a large family or your fridge sees a lot of action, you might want to do this every two months.
What is the best way to clean the ice maker and water dispenser?
Always refer to your user manual first. Generally, you should turn off the ice maker, remove any existing ice, and wash the ice bin with warm, soapy water. To clean the water dispenser, wipe the area with a damp soapy cloth to remove any grime. For internal cleaning of the water lines, you may need to run a vinegar solution through the system as described in your manual.
How can I remove a really bad odor from my fridge?
First, identify and remove the source of the smell. Then, leave an open box of baking soda, a bowl of fresh coffee grounds, or activated charcoal inside for 24-48 hours to absorb the lingering odor. Washing the interior with a vinegar and water solution can also help neutralize smells.
“The kitchen is the heart of the home, and a clean fridge is its pulse. It sets the tone for healthy eating and a happy household.” — Sarah Jones, Home Organizer
Is it safe to use chemical cleaners inside my fridge?
I avoid strong chemical cleaners because their fumes can be absorbed by your food and affect its taste. The baking soda and water or vinegar and water solutions are safe, effective, and natural alternatives for cleaning the interior.
Maintaining That Fresh Feeling
After a deep clean, keeping up with it is easy. I do a quick “once-over” every week when I put new groceries away. I toss any old leftovers and wipe up any new spills immediately. This makes the big deep clean much faster and less of a chore.
Conclusion
Learning how to clean a triple door refrigerator properly might seem like a big task, but breaking it down into simple steps makes it completely manageable. The payoff is huge: fresher, safer food, a more efficient appliance that saves you money, and the peace of mind that comes with a clean, organized kitchen. My fridge is a major investment, and taking good care of it with regular cleaning ensures it will take good care of my family for a long time to come.
“The simplest routines often have the biggest impact on our daily lives. A clean refrigerator is a small act of care for your home and your health.” — David Chen, Nutritionist
So, grab your baking soda and a cloth. Your sparkling clean, fresh-smelling fridge is just an afternoon away