Your refrigerator might not be defrosting due to a faulty defrost heater, thermostat, or timer—let’s troubleshoot the issue quickly to keep your food fresh!
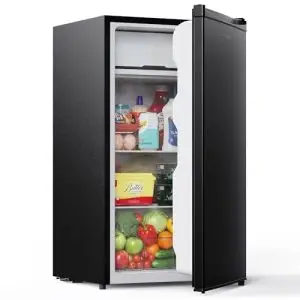
Your refrigerator not defrosting? Don’t worry – you’re not alone. Bad defrost systems are one of the most common problems that refrigerator owners face. The most obvious sign is completely frosted evaporator coils.
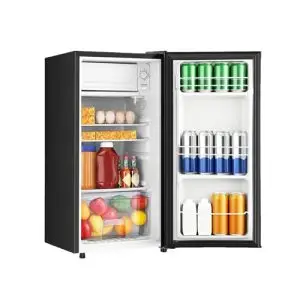
The problem is serious because ice works as an insulator. It stops your cooling coils from keeping the right temperatures – 40°F in the refrigerator and 0°F in the freezer. This ice buildup affects the airflow and cooling by a lot. Your freezer food becomes soft and the drinks in your fridge stay warm.
There’s good news though. Most modern refrigerators have automatic defrost systems that should stop ice from building up. These systems turn on two to three times each day and run for about 25 minutes. But if any of the three main parts fail – the defrost heater, thermostat, or control board – frost keeps piling up.
Let’s look at why your refrigerator’s defrost system might be failing and fix it together. We’ll help get your fridge running perfectly again!
“A well-maintained refrigerator lasts longer and runs efficiently.” — Appliance Expert, John Carter
Understanding the Defrost System in Refrigerators

“There are many separate components in a refrigerator’s defrost system that must work in concert for a frost free system to work properly.” — Dan O. (Appliance411), Senior Appliance Technician and Author, Appliance411
Your automatic defrost refrigerator works on a simple principle. A heating element melts frost from the evaporator coils to keep proper airflow. This system helps maintain your appliance’s cooling efficiency.
What the defrost system does
The defrost system in your refrigerator melts frost that builds up on the cooling element (evaporator coil). Frost would keep building up without this system and block airflow, which reduces cooling efficiency. On top of that, it helps air move better, stops food from freezing together, controls temperature, and prevents bad smells.
The air’s moisture freezes on evaporator coils when temperatures drop below 32°F. Frost acts like an insulator as it builds up and doesn’t let refrigerant absorb heat properly. Your refrigerator then doesn’t deal very well with keeping the right temperature, which could spoil your food.
Most models use either time-based systems (Defrost Timer) or usage-based systems (Adaptive Defrost) to defrost automatically. You might notice your refrigerator gets quiet during a defrost cycle. The fan stops, there’s no compressor noise, and this lasts about 25 to 45 minutes, once or twice daily.
Key components: heater, thermostat, timer, control board

Four main parts work together in the defrost system:
- Defrost Heater – This part melts frost off the evaporator coils. It uses a wire filament inside a quartz, glass, or aluminum tube that heats up when powered. Don’t worry if you see a red, yellow, or orange glow from your freezer – that’s normal.
- Defrost Thermostat (also called defrost limit switch) – This switch stops overheating. It cuts power to the heater when the evaporator gets above a set temperature (usually 40°F or 5°C). Your frozen food stays frozen during defrost cycles because of this part.
- Defrost Timer – This controls the defrost cycle timing. Regular mechanical timers track how long the compressor runs and start defrost every 8 to 15 hours. The timer makes sure the compressor and defrost heater never run at the same time.
- Control Board – Modern refrigerators use electronic control boards instead of mechanical timers. These boards manage temperature and defrost functions. They also control DC fan motors at different speeds based on how you use your refrigerator.
These parts explain why your refrigerator might not defrost properly. If you see frost building up even with regular defrost cycles, one of these parts might have stopped working.
“Ignoring frost buildup can strain your fridge and increase energy costs.” — HVAC Specialist, Lisa Monroe
How Each Component Can Fail
Your refrigerator’s evaporator coils might have a defrost system failure at the time frost keeps building up. A good understanding of these failure points will help diagnose the specific issue.
Defrost heater not heating
The defrost heater ended up as the component that melts frost from evaporator coils. This part usually fails in two distinct ways:
The heating element can completely burn out. You’ll spot a visible break in the component or surface blistering. A working defrost heater should register resistance between 20 and 50 ohms during multimeter testing. Zero or infinity readings point to a defective heater that needs replacement.

Physical damage represents another failure mode. Items like aluminum foil or plastic bags near the heating element melt and stick to it permanently. Ice buildup can also damage the heater and create dangerous electrical issues.
Thermostat not sensing temperature
The defrost thermostat typically fails because it doesn’t close or open the circuit at the right temperatures. This part needs to close the circuit below 40°F so the heater works properly.
A malfunctioning thermostat leads to two opposite issues. The compressor might stop running completely, or the heater and fan could operate non-stop. Both situations lead to a warm refrigerator and food spoilage.
Timer stuck or not advancing
Defrost timers determine the start and end of defrost cycles. Timer motors, bearings, and reduction gears wear down over time. A faulty timer might:
- Get stuck cooling – which causes too much frost as defrosting stops
- Stay in defrost mode – which stops cooling and keeps everything warm
The timer component often makes unusual noises before it completely fails.
Control board not sending power
The control board acts as your refrigerator’s command center and manages power distribution to components. Failed boards cause several issues:
- Defrost cycles never start
- Power doesn’t reach the defrost system
- Compressors run during scheduled defrost periods
Defective control boards usually show burn marks or shorted components during visual checks. A bad control board prevents proper system operation even if other parts test fine.
How to Test and Replace Defrost Parts
“For the cooling cycle, we should get continuity between pin 1 and pin 4. This is because when the timer is not in defrost mode, pin 1 connects to pin 4. If we do not get continuity, there may be a problem with defrost timer.” — SkillCat Technical Team, HVAC and Appliance Training Platform
A refrigerator’s defrost system diagnosis requires testing each component carefully. You can identify failed parts and fix them yourself with some simple tools.
Using a multimeter to test continuity

You must unplug your refrigerator from the power source to avoid electrical shock. A digital multimeter will help you determine if your defrost components work properly.
To test the defrost heater:
- Set your multimeter to the ohms or resistance setting (usually marked with Ω)
- Locate and disconnect the wires connected to the defrost heater
- Touch the multimeter probes to each terminal of the heater
- A working heater should show resistance between 20 and 100 ohms
To test the defrost thermostat:
- Remove it from the evaporator coil
- The thermostat should show no continuity at room temperature (infinite resistance)
- The thermostat should show continuity (zero ohms) below 32°F
Zero or infinity readings on a defrost heater indicate failure and need replacement.
Locating and replacing the defrost heater
You’ll find the defrost heater in one of these locations:
- Behind the rear panel of the freezer compartment
- Under the floor of your freezer section
- Beneath the refrigerator’s evaporator coils
To replace the heater:
- Remove freezer contents, shelves, and access panels
- Disconnect the wire connectors from the heater terminals (use needle-nose pliers if needed)
- Release any mounting clips or screws securing the heater
- Remove the old heater without touching glass components with bare fingers
- Install the new heater in the same position
- Reconnect wires and reassemble all components
How to identify a faulty control board
A malfunctioning control board might be the issue after testing both heater and thermostat. Watch for these signs:
- Visible burn marks on the board
- Compressor not shutting down during defrost cycles
- No voltage reaching the defrost heater despite good heater and thermostat
Repair experts suggest replacing all three components simultaneously if the defrost system fails. This approach proves economical over time.
Quick Fixes and Long-Term Solutions
A malfunctioning defrost system in your refrigerator needs both quick fixes and lasting solutions. Your food safety depends on how well you handle this problem while finding the root cause.
Manual defrosting as a temporary fix
Manual defrosting gives you immediate relief when your refrigerator keeps building up ice. Start by unplugging your refrigerator and taking out all food items. A fan pointed directly into the refrigerator compartment speeds up the process.
Many people think ice picks help, but they can damage your refrigerator’s parts – stay away from them. Here are safer ways to handle the ice:
- Set pots of boiling water inside (on towels) to help melt the ice faster
- Use a hairdryer to carefully melt stubborn ice patches
- Let the ice melt naturally by keeping doors open for several hours
Refrigerators with heavy ice buildup need 2-3 days unplugged to fix the problem completely.
Replacing all components at once
Most repair experts suggest replacing the three main defrost components together. This saves you from hunting down which specific part failed, since broken components usually show similar signs of trouble.
Parts that age together tend to fail close to each other. Replacing everything at once costs less than making multiple service calls for individual parts.
Tips to extend the life of your defrost system
These preventive steps help avoid future defrost problems:
- Watch your frost levels and start manual defrosting when ice gets thicker than ¼ inch
- Keep the inside clean without spills that help frost form
- Make sure air flows freely by avoiding overcrowding and keeping vents clear
- Look for cracks or buildup on door seals that might let warm air in
- Use the right temperature settings – too cold leads to extra frost
Refrigerators in unheated spaces like garages face special challenges because cold temperatures affect their defrost cycles. Older units running for more than 10 years might cost less to replace than repair when defrost issues get complex.

Conclusion
Dealing with your refrigerator’s defrost problems can be frustrating, but you can manage them with proper understanding and maintenance. You can prevent major damage to your appliance by monitoring frost levels and making repairs on time.
Component failures cause most defrost problems, which you can identify through basic testing. Quick action to replace parts or overhaul the system saves money and keeps your food from spoiling.
Manual defrosting works as a quick fix, but fixing the underlying cause is crucial to your system’s performance. Your refrigerator’s defrost system will work well for years with regular maintenance and attention to warning signs.
The age of your appliance should guide your decision between repairs and replacement. All but one of these refrigerators over 10 years old might do better with an upgrade instead of major repairs. These guidelines will help your refrigerator maintain peak cooling performance throughout its life.
“Preventative care saves money and extends appliance life.” — Home Appliance Repair, Mike Stevens
FAQs For Why is my refrigerator not defrosting?
Why is my refrigerator not defrosting automatically?
Your refrigerator may not be defrosting due to a faulty defrost system component. Common culprits include a malfunctioning defrost heater, thermostat, timer, or control board. Regular inspection and maintenance of these parts can help prevent defrosting issues.
How can I manually defrost my refrigerator as a temporary solution?
To manually defrost your refrigerator, unplug it and remove all food items. You can speed up the process by placing pots of hot water inside (on towels) or using a hairdryer to gently melt ice. Avoid using sharp objects that could damage components. Keep doors open and allow several hours for complete defrosting.
What are the signs of a faulty defrost thermostat?
A faulty defrost thermostat may cause excessive ice buildup on evaporator coils, temperature fluctuations, or constant fan operation. You can test it using a multimeter – at room temperature, it should show no continuity, while below 32°F, it should show continuity.
How often should a refrigerator’s defrost cycle occur?
Most modern refrigerators initiate defrost cycles two to three times daily, lasting about 25 minutes each. However, the frequency can vary depending on the model and usage patterns. If you notice persistent frost buildup, it may indicate a problem with the defrost system.
When should I consider replacing my refrigerator instead of repairing the defrost system?
For refrigerators over 10 years old, replacing the entire unit might be more economical than repairing complex defrost issues. Consider factors such as overall appliance condition, energy efficiency, and the cost of potential repairs when making this decision.