Refrigerator water filter installation steps are the simple process of removing your old filter and fitting a new one correctly so your fridge can deliver clean, safe water. It matters because a properly installed filter improves water taste and helps remove contaminants.
If your fridge water tastes odd or your ice smells strange, I’ve been there too. Most of the time, the issue comes down to a filter that needs replacing or was not installed properly.
I’ve helped many homeowners fix this in just a few minutes without calling a technician. In this guide, I’ll walk you through refrigerator water filter installation steps in a way that feels simple and doable, even if you’ve never done it before. By the end, you’ll know exactly what to do and avoid common mistakes.
Common Problems People Face (And How to Fix Them)
1. “I don’t know which filter fits my fridge”
This is one of the most common issues I see.
Different brands like Whirlpool, Samsung, and LG use different filter models. Buying the wrong one is easy, especially online.
Why it happens:
Model numbers vary by region. A fridge sold in the USA may use a different filter than one in the UK or Australia.
Solution you can use today:
- Check your fridge manual or inside label
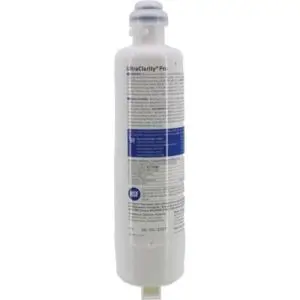
- Look for the filter model printed on the old filter
- Match it exactly when buying
Example: In Canada and the US, many Whirlpool fridges use EveryDrop filters, while UK models may differ slightly.
2. “The filter won’t come out”
A stuck filter can feel frustrating.
Why it happens:
- Mineral buildup from hard water
- Filter not turned fully before removal
Solution:
- Turn the filter slowly counterclockwise
- Use a dry cloth for better grip
- If needed, gently wiggle it while pulling
Quick tip: Never force it too hard, or you risk damaging the housing.
3. “Water tastes weird after installation”
You installed the filter, but the taste is still off.
Why it happens:
- Air trapped in the system
- Carbon residue from a new filter
Solution:
- Run water for 3–5 minutes after installation
- Discard the first few batches of ice
Real-life example: A homeowner in Australia once told me their water tasted dusty after replacement. After flushing properly, the issue disappeared.
Understanding Refrigerator Water Filters
Before jumping into the steps, let me explain something important.
Refrigerator water filters use activated carbon to remove:
- Chlorine (bad taste and smell)
- Sediment (tiny particles)
- Some heavy metals
“Activated carbon is highly effective at reducing chlorine and improving taste in drinking water.” — Dr. Timothy D. Snyder, Water Quality Researcher
This is why installing your filter correctly matters. A poor fit can let unfiltered water pass through.
Refrigerator Water Filter Installation Steps (Step-by-Step)
Here’s the exact process I follow every time.
Step 1: Locate Your Filter
Filters are usually found in:
- Inside the fridge (top right corner)
- Bottom grille (front base)
Tip: Check your manual if you’re unsure. Layouts differ in the UK vs US models.
Step 2: Turn Off the Water Supply (Optional but Safer)
In most modern fridges, you don’t need to shut off water. But I recommend it if:
- You’re new to this
- You’ve had leaks before
Step 3: Remove the Old Filter
Depending on your model:
- Twist counterclockwise and pull out
- Press a release button
Important: Don’t rush this step. A clean removal prevents damage.
Step 4: Prepare the New Filter
- Remove packaging
- Take off protective caps
- Align it properly
Some filters need soaking, but most modern ones don’t.
Step 5: Install the New Filter
- Insert the filter into the slot
- Turn clockwise until it locks
- Or push until it clicks
You should feel a secure fit.
“A properly seated filter ensures water flows through the filtration media instead of bypassing it.” — John Banta, Home Inspection Expert
Step 6: Flush the System
Run water for 3–5 minutes.
This clears:
- Air bubbles
- Loose carbon particles
Key takeaway: Skipping this step is the #1 reason people think their filter isn’t working.
Step 7: Reset the Filter Indicator
Many fridges show a filter warning light.
To reset:
- Press and hold the reset button (3–5 seconds)
- Check your manual for exact steps
Different Types of Refrigerator Filters
Understanding your filter type helps avoid confusion.
Push-In Filters
- Common in newer models
- Easy to replace
Twist-In Filters
- Require turning to lock/unlock
- Very secure
Inline Filters
- Installed in the water line behind the fridge
- Common in older UK homes
Real-world example: In Australia, many homes use inline filters due to plumbing setups, while US homes mostly use internal filters.
Mistakes I See People Make (Avoid These)
1. Installing the wrong filter
Even a small mismatch can cause leaks.
2. Not flushing the filter
Leads to bad taste and cloudy water.
3. Forcing the filter into place
This can damage the housing, which is expensive to repair.
“Regular filter replacement and proper installation help maintain safe drinking water quality.” — Dr. Andrew Whelton, Environmental Engineer
How Often Should You Replace Your Filter?
Most filters last:
- 6 months (standard recommendation)
- Or 200–300 gallons of water
But this depends on:
- Water quality in your area
- Usage level
Examples:
- In parts of Canada with hard water, filters may clog faster
- In the UK, limescale can reduce lifespan
Tip: If your water flow slows down, it’s time to replace the filter.
Cost and Availability (USA, UK, Canada, Australia)
Prices vary by region:
- USA: $30–$60 per filter
- UK: £25–£50
- Canada: CAD 40–80
- Australia: AUD 50–90
You can find filters in:
- Amazon
- Home improvement stores
- Appliance retailers
When You Should Call a Professional
Most installations are easy, but I recommend help if:
- Water is leaking after installation
- Filter housing is broken
- You have an inline system and aren’t confident
Honest note: I’ve fixed most issues myself, but sometimes a plumber saves time and stress.
Helpful Maintenance Tips
- Replace filters every 6 months
- Clean the filter housing
- Keep track of installation date
Small habit, big impact: Clean water improves both taste and appliance life.
Frequently Asked Questions
How long does it take to install a refrigerator water filter?
It usually takes 5–10 minutes. Even beginners can do it quickly with the right steps.
Do I need to turn off the water supply?
Not always. Most modern fridges allow filter replacement without turning off water, but it’s safer if you’re unsure.
Why is my water cloudy after installing a new filter?
This is normal. It’s caused by air bubbles and carbon dust. Run water for a few minutes, and it will clear.
Can I reuse an old water filter?
No, I don’t recommend it. Used filters lose effectiveness and may release trapped contaminants.
What happens if I don’t replace my filter?
Water quality drops, taste worsens, and your fridge may work harder. Over time, this can affect performance.
Final Thoughts
Installing a refrigerator water filter is one of the easiest ways to improve your home’s water quality. From my experience, the key things to remember are:
- Choose the correct filter model
- Install it securely without force
- Flush the system properly after installation
Once you get used to these refrigerator water filter installation steps, it becomes a quick routine you won’t think twice about. Take a few minutes today—your water will taste better, and your fridge will thank you.