To defrost a mini refrigerator properly, always start by unplugging the unit and removing all food and shelves. Then, allow the ice to melt naturally, using towels to soak up water, before wiping the interior clean and restarting the appliance.
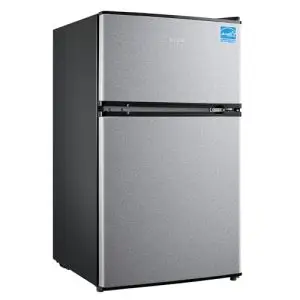
I’ve been there. You open your mini fridge, maybe the one in your home office, dorm room, or apartment, and you’re greeted by a small glacier. A thick layer of frost has taken over the freezer compartment, stealing precious space and making the motor work harder than it needs to. My first instinct years ago was to panic and reach for a knife to chip away at the ice. Big mistake. I learned the hard way that there’s a right way and a very wrong way to handle this common household task.
After that initial fiasco, I made it my mission to learn the correct, safe, and most effective method. Through trial, error, and conversations with appliance repair technicians, I’ve developed a simple, step-by-step routine that I now use every time. This process isn’t just about removing ice; it’s about maintaining your appliance’s health, saving on your electricity bill, and ensuring your food stays safe. Let’s walk through it together.
Why Defrosting is Non-Negotiable

You might be wondering if you can just let the frost be. While a little bit of frost might seem harmless, ignoring it leads to bigger problems. Modern mini fridges, especially those with auto-defrost features, handle this better, but many older or more basic models are manual defrost and need your help.
Here’s what happens if you don’t defrost:
- Reduced Energy Efficiency: That layer of frost acts as an insulator, forcing the compressor to run longer and more frequently to maintain the set temperature. This uses more electricity and can cause a noticeable spike in your energy costs.
- Less Storage Space: The ice buildup physically takes up room where your snacks and drinks should be.
- Potential Damage: Excessive frost can strain the cooling system and, in worst-case scenarios, damage components like the evaporator coils, leading to a costly repair or the need for a full replacement.
- Warmer Temperatures: Ironically, the frost can prevent the fridge from cooling effectively, putting your perishable food items at risk.
A regular defrosting schedule is one of the simplest forms of preventative maintenance you can do for your appliance.
Step-by-Step Guide to a Frost-Free Mini Fridge
This is the exact process I follow. Setting aside about two to four hours for the entire task is a good idea, though the actual active time is much less.
Step 1: Preparation is Key

First, check the owner’s manual for any specific instructions from the manufacturer. If you’ve lost it, a quick online search for your model number usually turns up a digital copy.
- Unplug the Refrigerator: This is the most critical safety step. Never, ever try to defrost a fridge that is still plugged in. Water and electricity are a dangerous combination.
- Remove All Contents: Take out all food, drinks, shelves, and crisper drawers. This gives you a clear workspace.
- Deal with the Food: Group your perishable items together in a cooler with ice packs to keep them cold and safe. For non-perishables, find a cool, shaded spot on your counter.
Step 2: The Defrosting Process – Patience Pays Off

Now, it’s time to tackle the ice. The golden rule here is to never use sharp objects like knives, screwdrivers, or scrapers to chip away the frost. You can easily puncture a coolant line or damage the interior lining, which can ruin the entire unit.
There are three safe methods I recommend:
- The Natural Method (My Go-To): This is the safest and easiest. Simply leave the fridge door open and let the ice melt on its own. Place old towels or a shallow pan on the floor in front of the fridge and inside to catch the dripping water. This method can take a few hours, but it requires zero effort and is completely risk-free.
- The Boosting Method: To speed things up a bit, you can place a bowl of hot (not boiling) water inside the fridge and shut the door for 10-15 minutes. The steam will help loosen the ice. You can repeat this process. A hairdryer on a cool or low-heat setting can also be used, but you must keep it moving and never direct it at one spot for too long, and ensure it never gets near any water.
- The Fan Method: Placing a fan to blow air into the open fridge can also circulate warmer air and reduce defrosting time.
While you wait for the ice to melt, this is a perfect time to clean the shelves and drawers you removed. Wash them with warm, soapy water, rinse thoroughly, and let them air dry.
Step 3: Clean Up and Dry

Once all the ice has melted, you’ll be left with a wet interior.
- Soak Up Water: Use your towels to soak up all the standing water from the bottom of the fridge and the drain pan if your model has an accessible one.
- Wipe Down Interior: Mix a mild cleaning solution of warm water and a few drops of dish soap or baking soda. Using a soft cloth or sponge, wipe down the entire interior—walls, ceiling, and floor of the fridge. This removes any food spills or odors. Avoid harsh chemicals as they can damage the plastic and leave behind strong smells.
- Rinse and Dry Thoroughly: Go over the interior with a clean cloth dampened with fresh water to remove any soapy residue. Then, use dry towels to wipe everything down until it is completely dry. Any leftover moisture will just turn into your first layer of new frost.
Step 4: Restarting Your Mini Fridge

You’re almost done!
- Replace Shelves and Drawers: Once everything is clean and dry, put the shelves and crisper drawers back into their correct positions.
- Plug It Back In: Close the door and plug the refrigerator back into the wall outlet.
- Allow Time to Cool: Let the fridge run empty for about 30-60 minutes to allow it to get back down to its proper cooling temperature. Use a refrigerator thermometer if you have one to check that it’s holding a safe temperature (below 40°F or 4°C) before you restock your food.
How Often Should You Defrost?
The frequency depends on a few factors. A fridge in a humid environment or one that is opened frequently will frost up faster. As a general rule, I defrost my manual mini fridge whenever the frost layer gets to be about a quarter-inch thick. For most people, this might mean doing this routine every three to six months.
“The most common cause of appliance failure isn’t age; it’s the slow accumulation of neglect. A simple clean-out can add years to its life.” — James Carter, Appliance Repair Specialist
Frequently Asked Questions for Defrost a Mini Refrigerator
Can I use a heater to defrost my mini fridge faster?
I strongly advise against using any kind of space heater or heat gun. They produce far too much concentrated heat and can easily warp plastic components or even start a fire. Stick to the safer methods mentioned above.
What is the white stuff on the back wall of my fridge after defrosting?
That’s likely mineral deposits from water evaporation. It’s harmless and can be wiped away during your cleaning step with a vinegar-water solution.
My mini fridge doesn’t have a freezer. Does it still need defrosting?
Typically, no. The defrosting process is primarily for the freezer compartment where moisture freezes. A fridge-only unit shouldn’t build up frost.
I see water pooling at the bottom of my fridge after defrosting. Is that normal?
A little water is normal during the melting process. However, if you notice persistent pooling long after you’ve restarted it, there might be a clogged drain hole. You can check your manual for its location and use a pipe cleaner to gently clear it.
How can I prevent frost from building up so quickly?
Always make sure containers are covered, as moisture from food is a big contributor. Avoid putting hot food directly into the fridge, and try not to leave the door open for extended periods.
“A clean appliance is an efficient appliance. This is true for your car, your computer, and especially your refrigerator.” — Maria Garcia, Home Efficiency Expert
A Few Extra Pro-Tips
- Baking Soda is Your Friend: Placing an open box of baking soda inside your fridge between defrosting sessions will help absorb odors and keep it smelling fresh.
- Check the Door Seal: A worn-out or damaged door gasket lets warm, moist air inside, which accelerates frost buildup. Periodically check the seal and clean it with soapy water. If it’s cracked or doesn’t seal tightly, it might be time for a replacement.
- Vacuum the Coils: If your mini fridge has exposed coils on the back, gently vacuuming them every six months will help the entire system run more efficiently and reduce energy consumption.
Conclusion
Learning how to defrost a mini refrigerator properly is a simple but essential skill. It might seem like a chore, but the benefits are real: a more efficient appliance, lower energy bills, more storage space, and a longer lifespan for your trusty mini fridge. By following this straightforward guide, you can handle this task with confidence, knowing you’re taking good care of your appliance and your food. No more chipping at ice with a butter knife just a safe, effective, and simple routine that keeps things running smoothly.
“The goal of good maintenance is to prevent problems before they even have a chance to start. It’s the quiet art of foresight.” — David Chen, Facility Manager

Hi, I’m the lead researcher and appliance enthusiast behind RefrigeratorSolve. With years of hands-on experience troubleshooting cooling systems and testing home appliances, I am dedicated to bringing you honest reviews, energy-saving tips, and practical solutions to keep your refrigerator running perfectly.